How to Convert a Raster Image into Vector in Photoshop
![](https://photoshopwizards.com/wp-content/uploads/2023/09/image-25.png)
Open your image in Photoshop. It does not need to be a Black and White or a Grayscale one, any Color image will work as well.
![](https://photoshopwizards.com/wp-content/uploads/2023/09/image-25.png)
Step 2
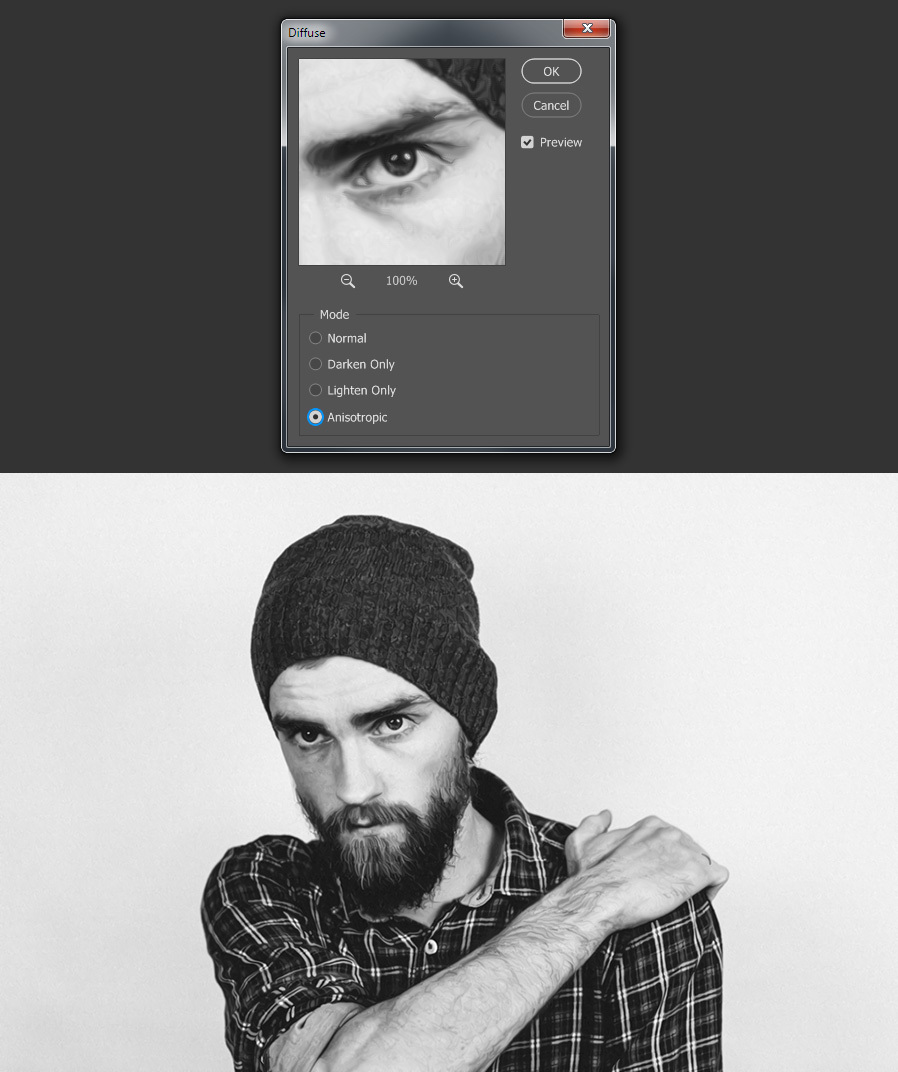
Go to Filter > Stilyze > Diffuse. In the Diffuse window select the Anisotropic Mode and click OK.
![](https://s3.medialoot.com/blog-images/How-to-Convert-a-Raster-Image-into-Vector-in-Photoshop/02.jpg?mtime=20190211115603)
Step 3
Again, go to Filter > Stilyze > Diffuse. In the Diffuse window select the Anisotropic Mode and click OK.
![](https://s3.medialoot.com/blog-images/How-to-Convert-a-Raster-Image-into-Vector-in-Photoshop/03.jpg?mtime=20190211115605)
Step 4
Go to Layer > Duplicate Layer. Name this layer as “High Pass” and click OK.
![](https://s3.medialoot.com/blog-images/How-to-Convert-a-Raster-Image-into-Vector-in-Photoshop/04.jpg?mtime=20190211115606)
Step 5
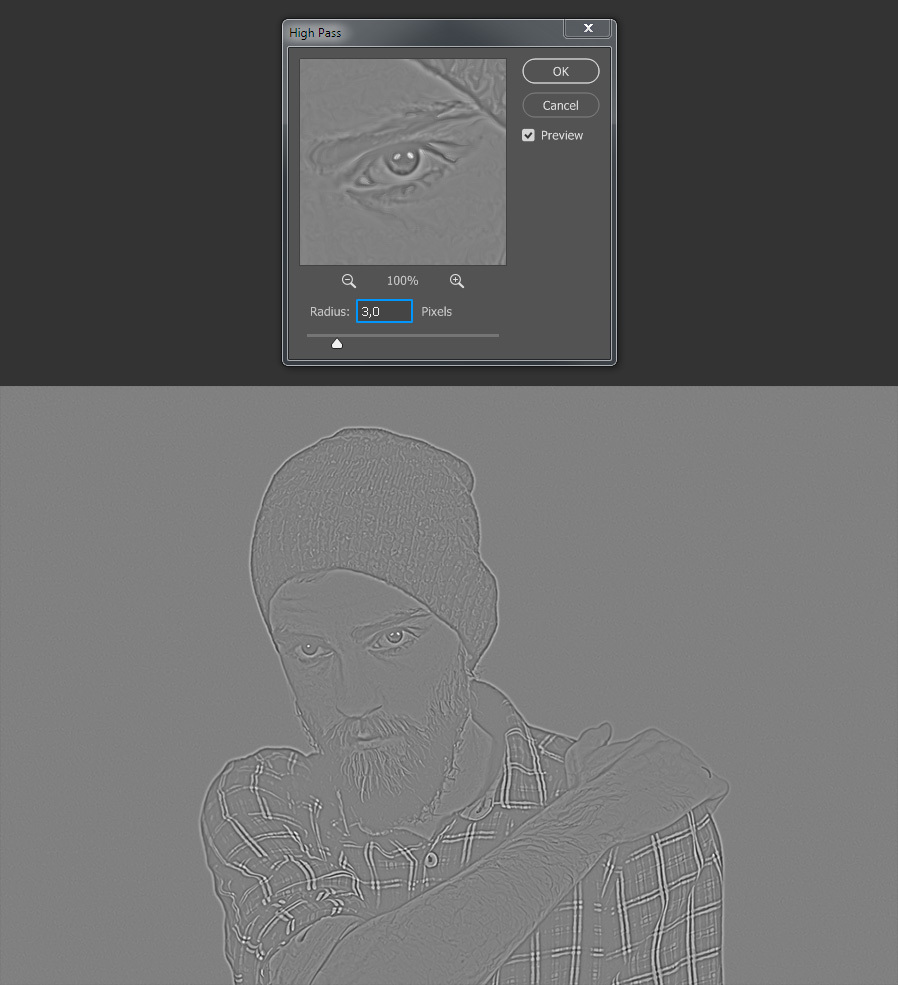
With the “High Pass” layer selected go to Filter > Other > High Pass. Set a value of 3 and click OK.
![](https://s3.medialoot.com/blog-images/How-to-Convert-a-Raster-Image-into-Vector-in-Photoshop/05.jpg?mtime=20190211115607)
Step 6
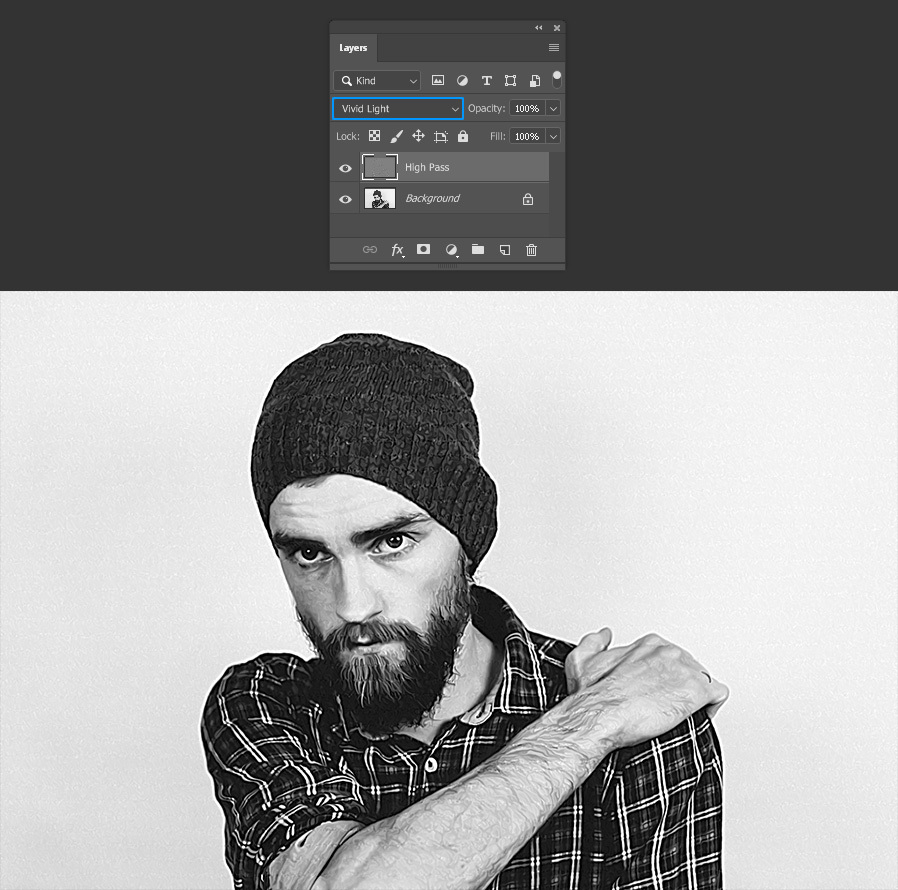
In the Layers Panel set the blending mode of the “High Pass” layer to Vivid Light.
![](https://s3.medialoot.com/blog-images/How-to-Convert-a-Raster-Image-into-Vector-in-Photoshop/06.jpg?mtime=20190211115609)
Step 7
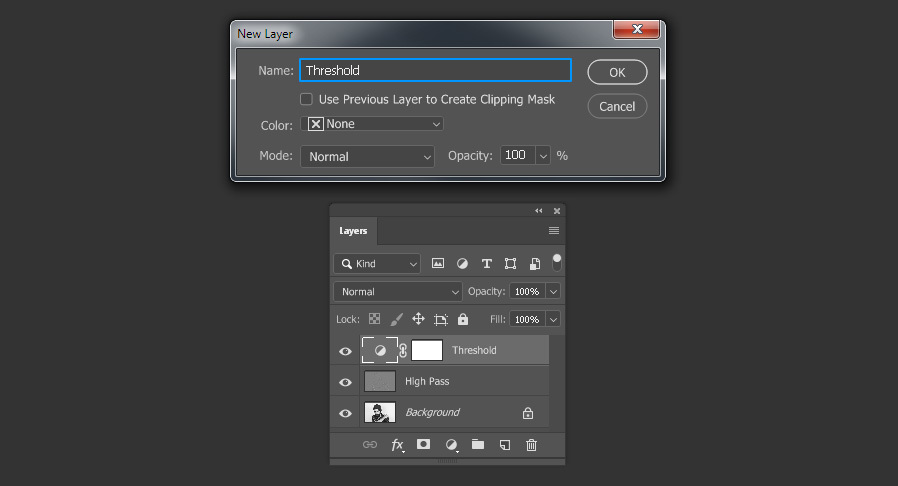
Go to Layer > New Adjustment Layer > Threshold. Name this layer as “Threshold” and click OK.
![](https://s3.medialoot.com/blog-images/How-to-Convert-a-Raster-Image-into-Vector-in-Photoshop/07.jpg?mtime=20190211115610)
Step 8
Adjust the Threshold level according to the image you are using. In this case a value of 138 will work just fine.
![](https://s3.medialoot.com/blog-images/How-to-Convert-a-Raster-Image-into-Vector-in-Photoshop/08.jpg?mtime=20190211115611)
Step 9
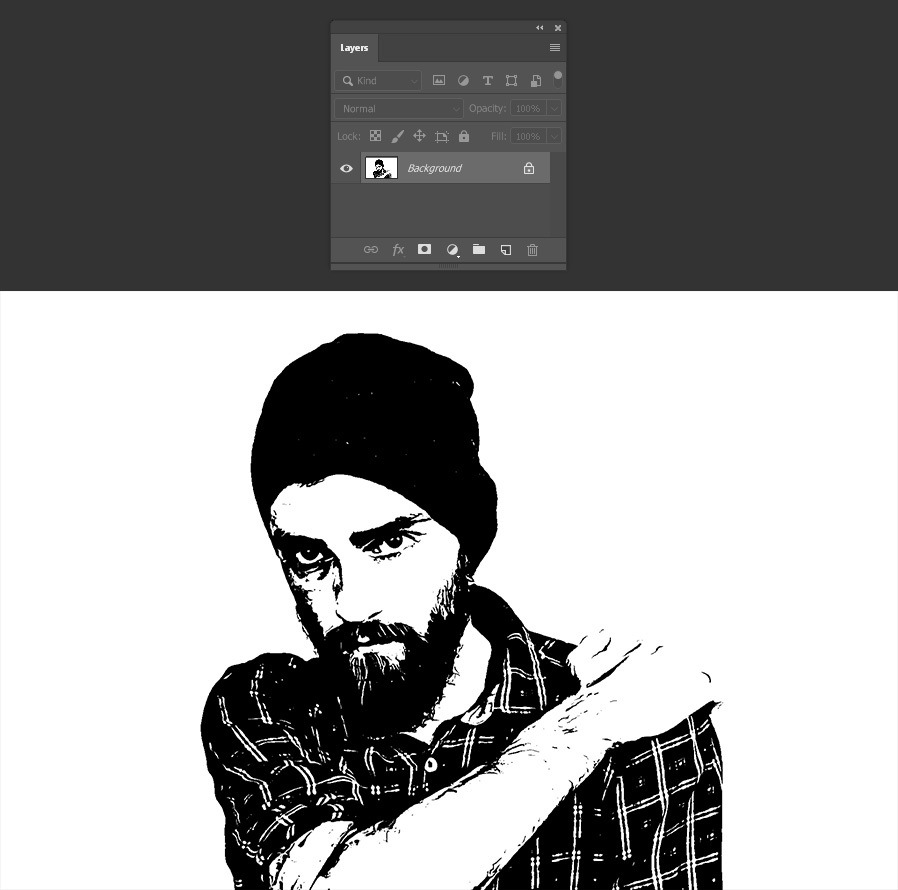
Once you are happy with the Threshold result, go to Layer > Merge Visible.
![](https://s3.medialoot.com/blog-images/How-to-Convert-a-Raster-Image-into-Vector-in-Photoshop/09.jpg?mtime=20190211115612)
Step 10
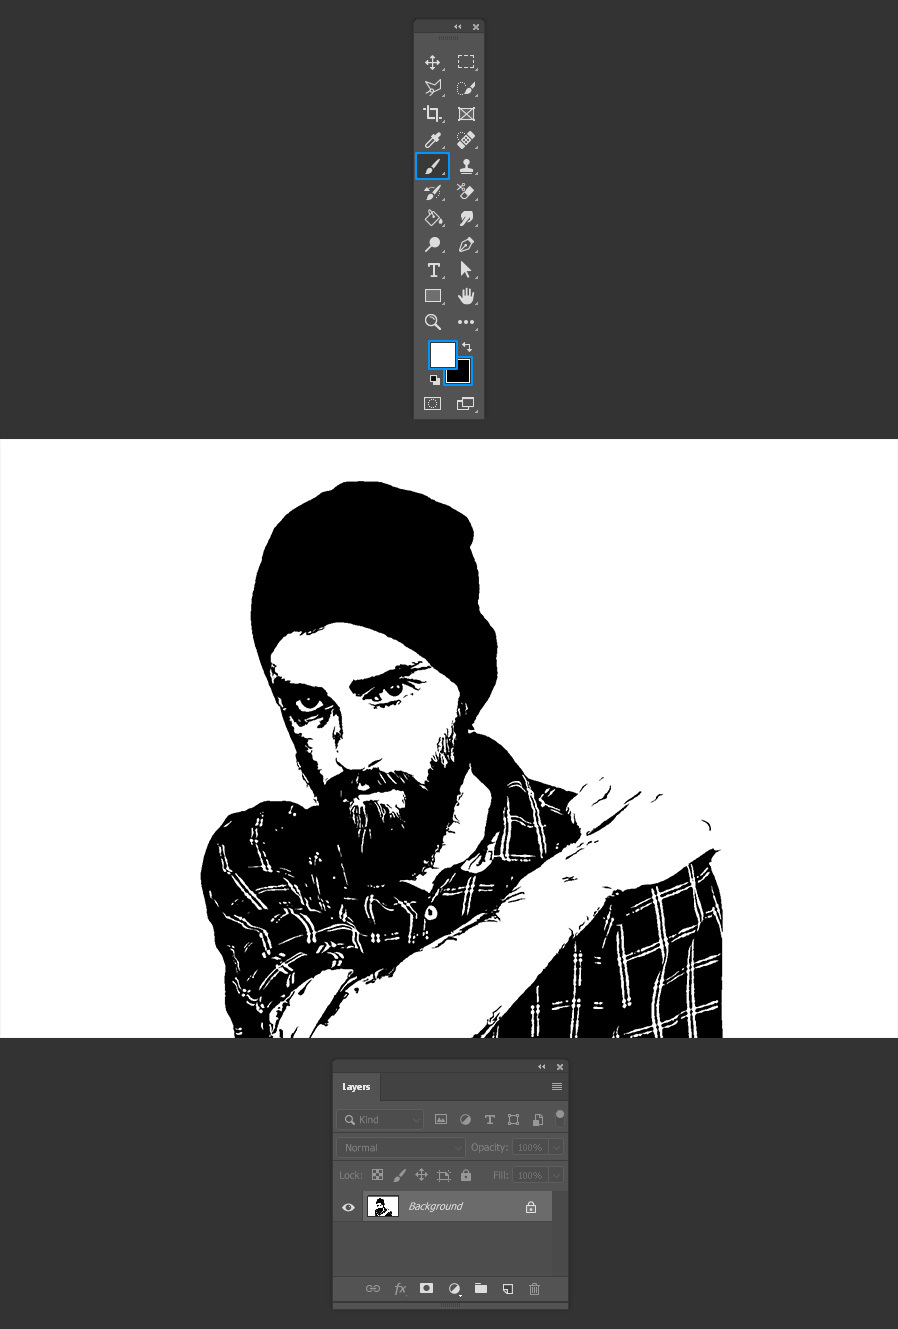
At this point you can remove all the unnecessary details using the Brush Tool (B) with black and white colors.
![](https://s3.medialoot.com/blog-images/How-to-Convert-a-Raster-Image-into-Vector-in-Photoshop/10.jpg?mtime=20190211115614)
Step 11
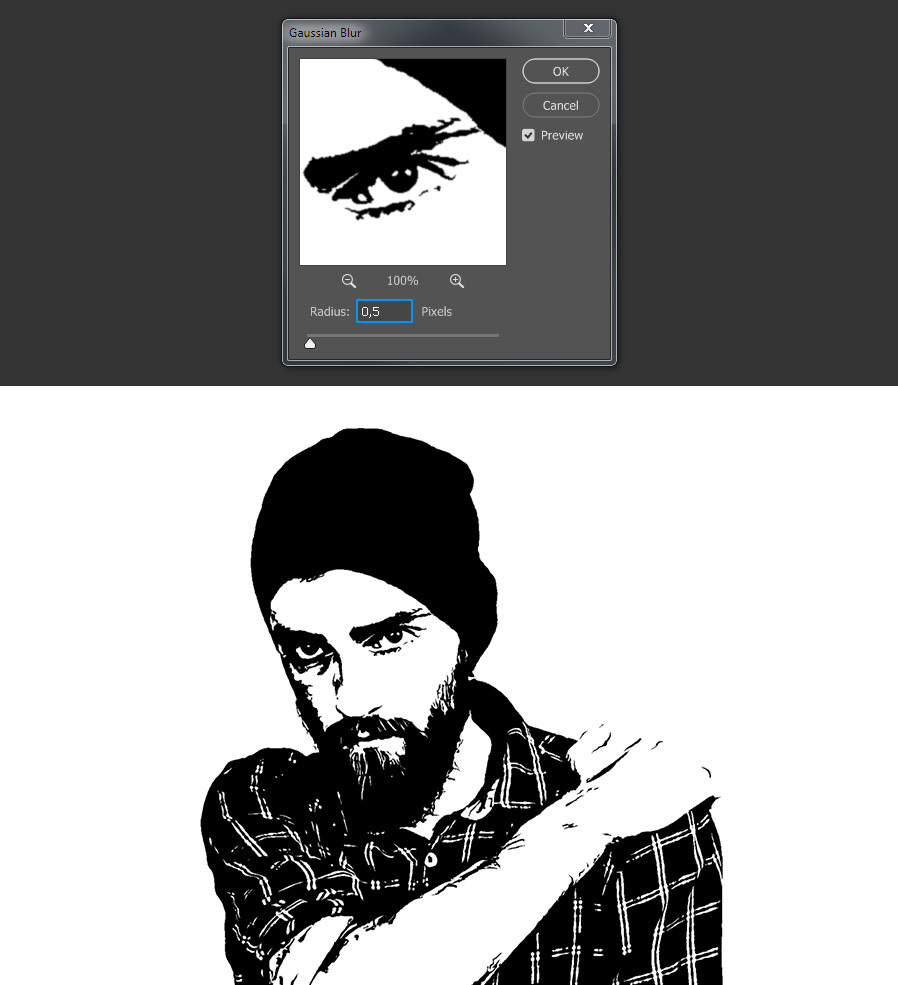
With the merged layer selected go to Filter > Blur > Gaussian Blur. Set a value of 0,5 pixels and click OK.
![](https://s3.medialoot.com/blog-images/How-to-Convert-a-Raster-Image-into-Vector-in-Photoshop/11.jpg?mtime=20190211115615)
Step 12
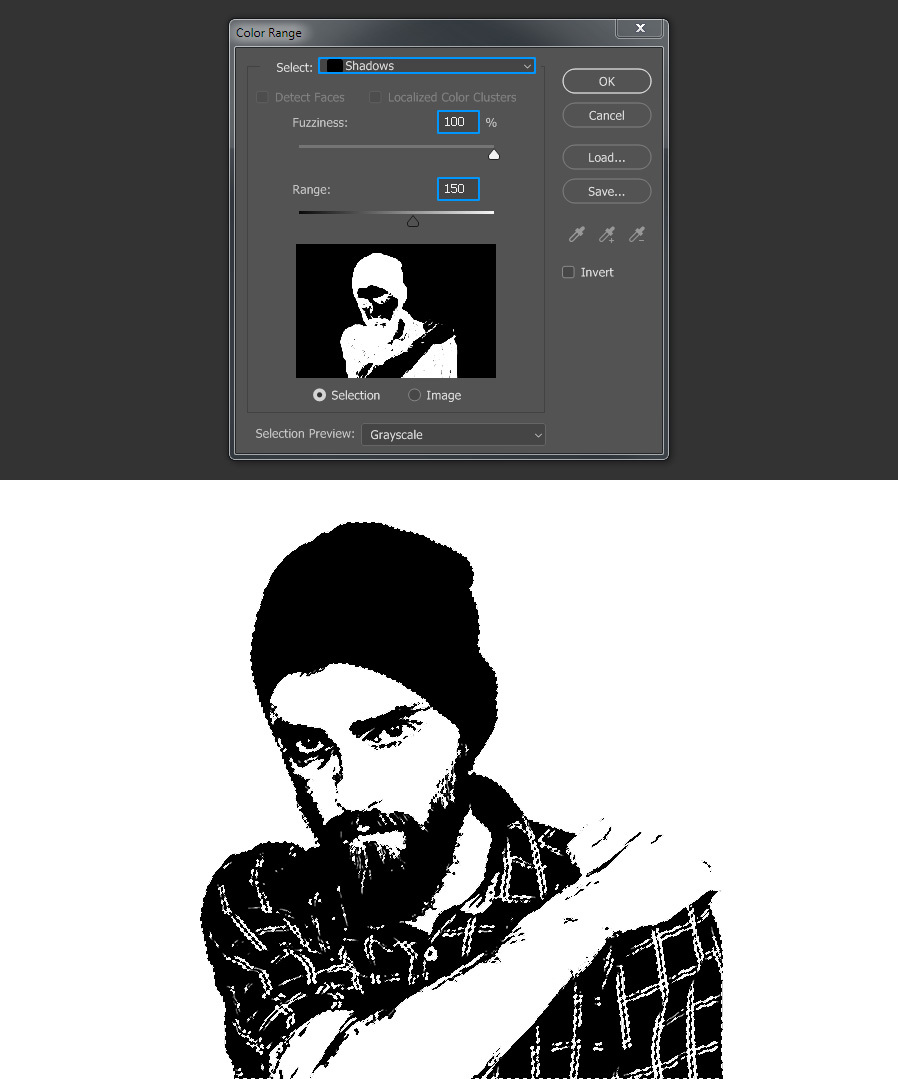
Go to Select > Color Range. Select “Shadows” from the dropdown menu and adjust the Fuzziness and Range to your liking. In this case I will set the Fuzziness to 100% and the Range to 150. When you are happy with the selection click OK.
![](https://s3.medialoot.com/blog-images/How-to-Convert-a-Raster-Image-into-Vector-in-Photoshop/12.jpg?mtime=20190211115616)
Step 13
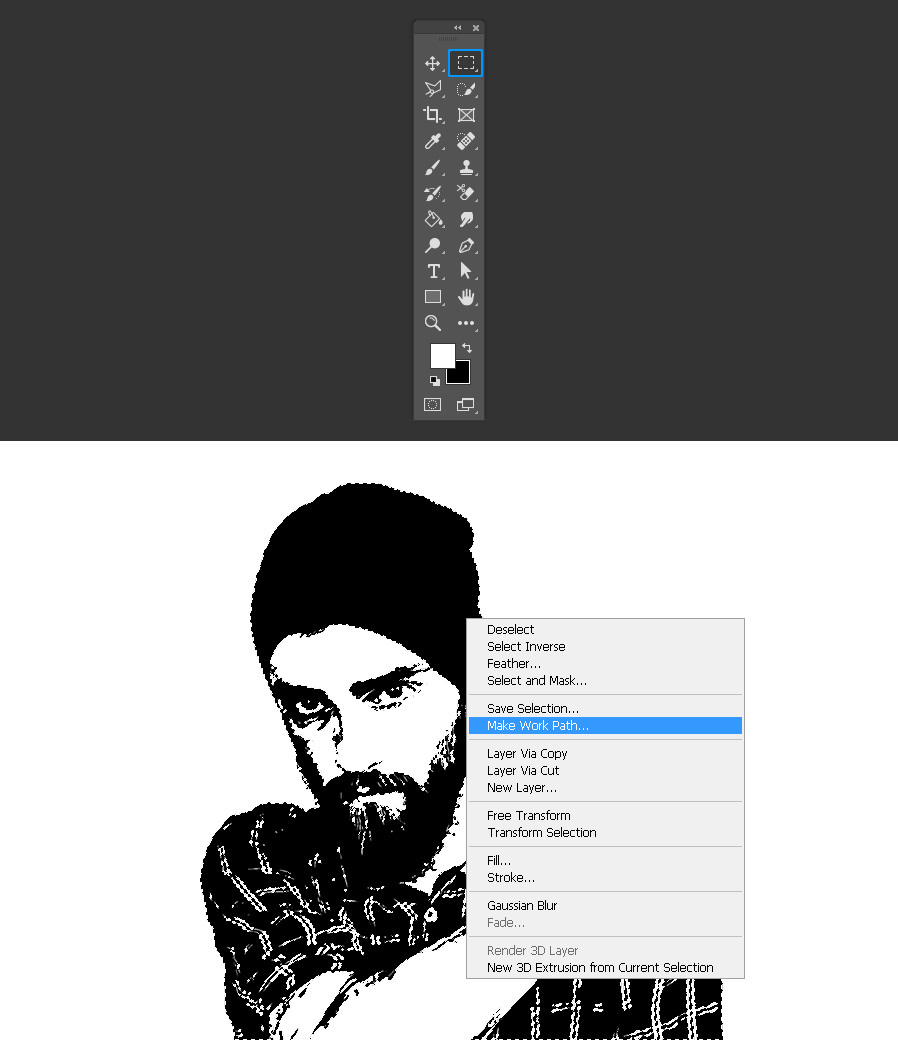
With the selection active, select the Rectangular Marquee Tool (M) and right click over the selection. From the dropdown menu select “Make Work Path”.
![](https://s3.medialoot.com/blog-images/How-to-Convert-a-Raster-Image-into-Vector-in-Photoshop/13.jpg?mtime=20190211115618)
Step 14
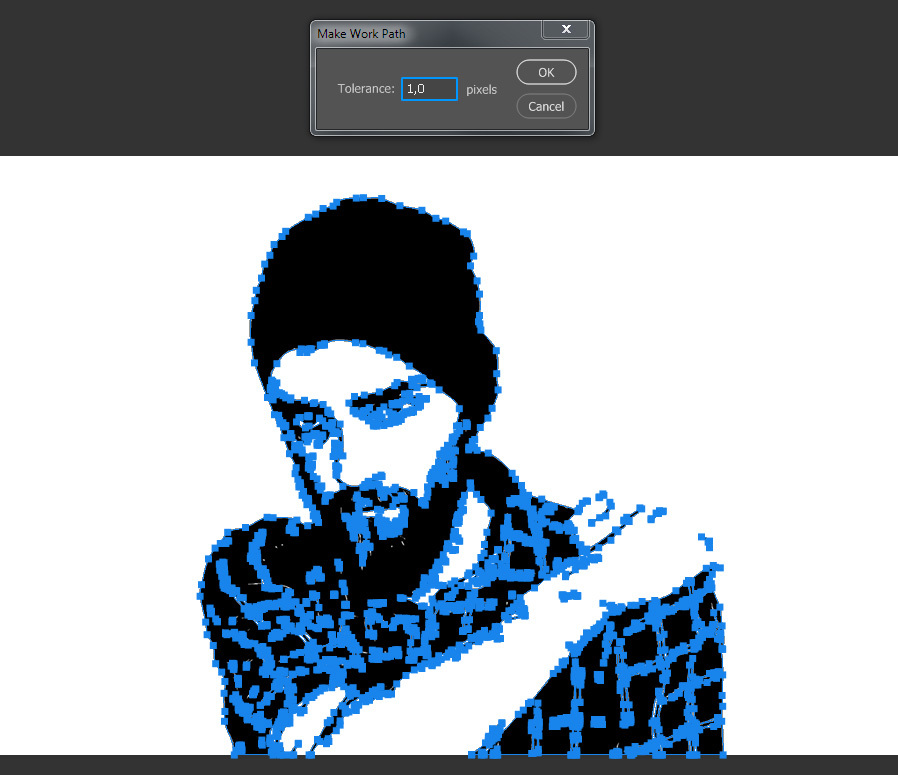
In the Make Work Path window, set the Tolerance to 1 or 1,5 pixels and click OK.
![](https://s3.medialoot.com/blog-images/How-to-Convert-a-Raster-Image-into-Vector-in-Photoshop/14.jpg?mtime=20190211115619)
Step 15
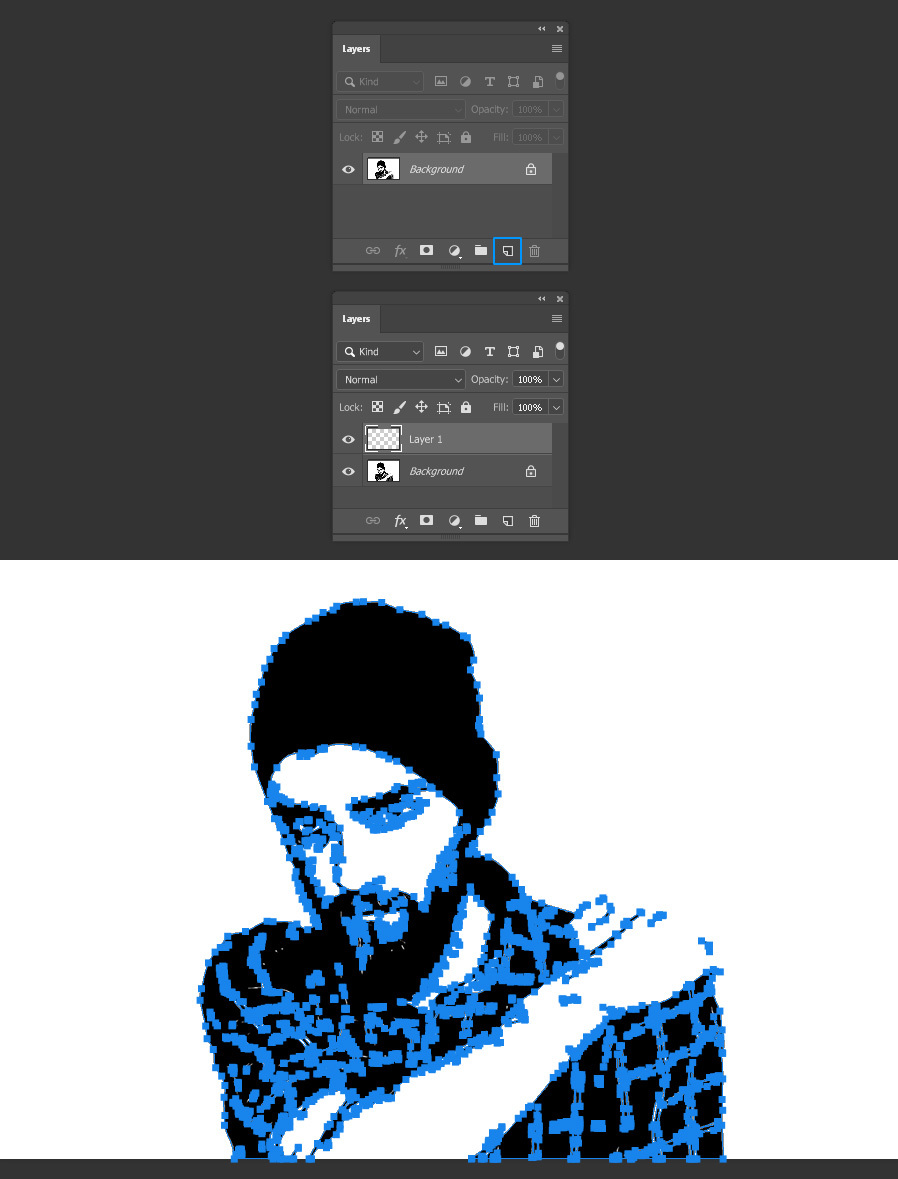
In the Layers Panel click on the “Create a New Layer” icon.
![](https://s3.medialoot.com/blog-images/How-to-Convert-a-Raster-Image-into-Vector-in-Photoshop/15.jpg?mtime=20190211115620)
Step 16
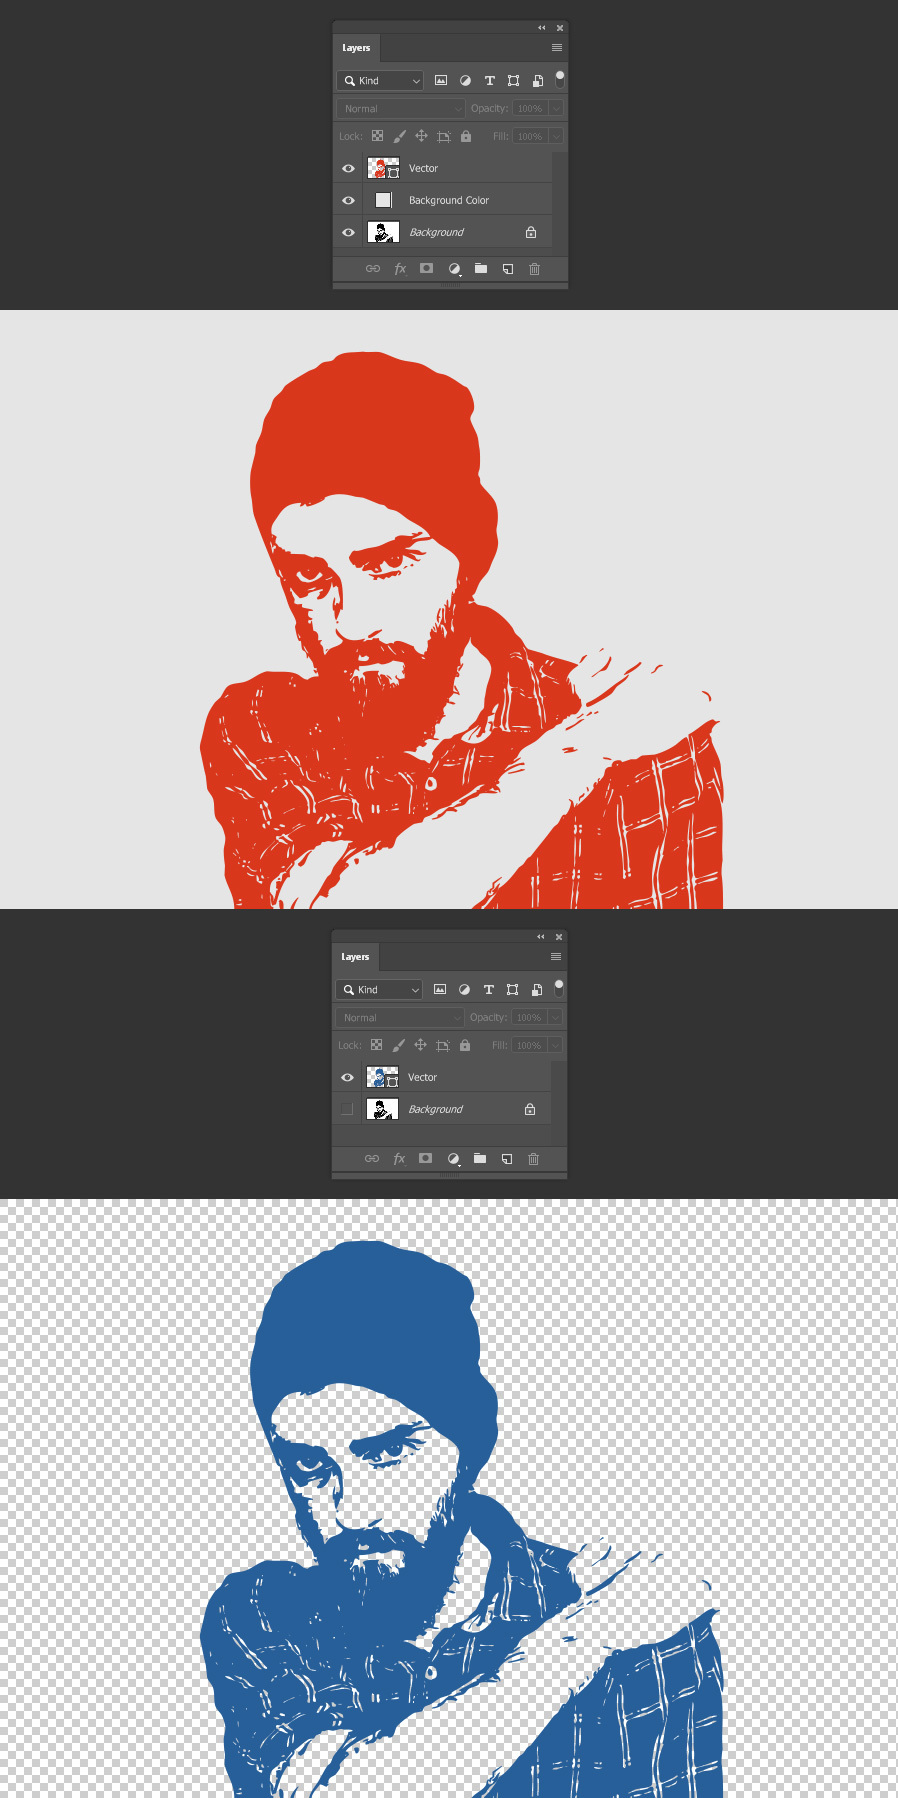
Go to Layer > New Fill Layer > Solid Color. Name this layer as “Vector” and click OK.
![](https://s3.medialoot.com/blog-images/How-to-Convert-a-Raster-Image-into-Vector-in-Photoshop/16.jpg?mtime=20190211115621)
Step 17
In the Color Picker window pick any color that you want and click OK.
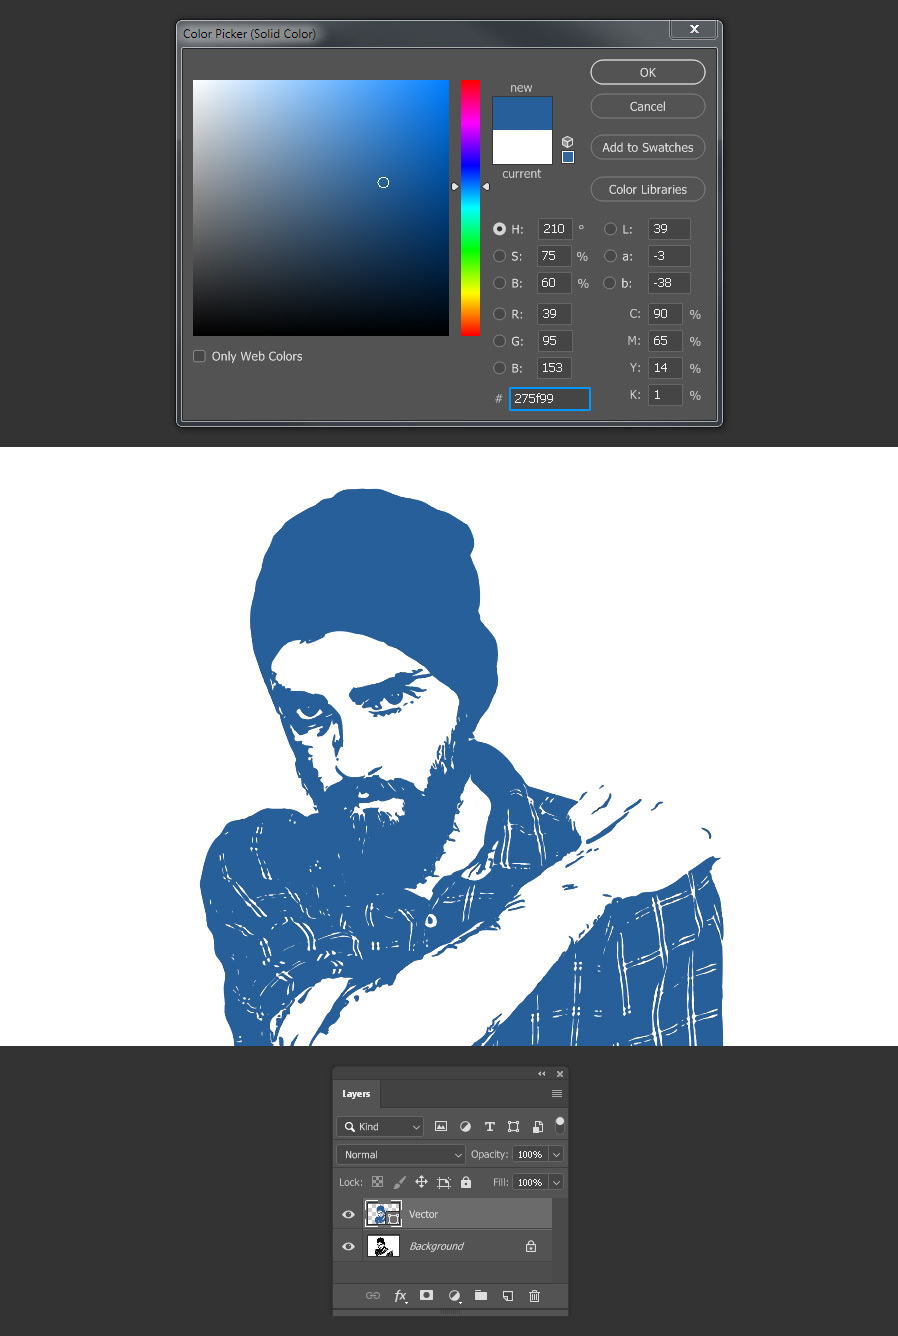
![](https://s3.medialoot.com/blog-images/How-to-Convert-a-Raster-Image-into-Vector-in-Photoshop/17.jpg?mtime=20190211115623)
Some Final Notes
Now you can scale the vector to any size and easily change your vector color with the Color Picker, make a new background layer to fill with any color or simply turn off the Background layer to have it over a transparent background.
![](https://s3.medialoot.com/blog-images/How-to-Convert-a-Raster-Image-into-Vector-in-Photoshop/18.jpg?mtime=20190211115627)