How to Create Furry Text in Photoshop
![](https://photoshopwizards.com/wp-content/uploads/2023/09/image-1-1024x640.png)
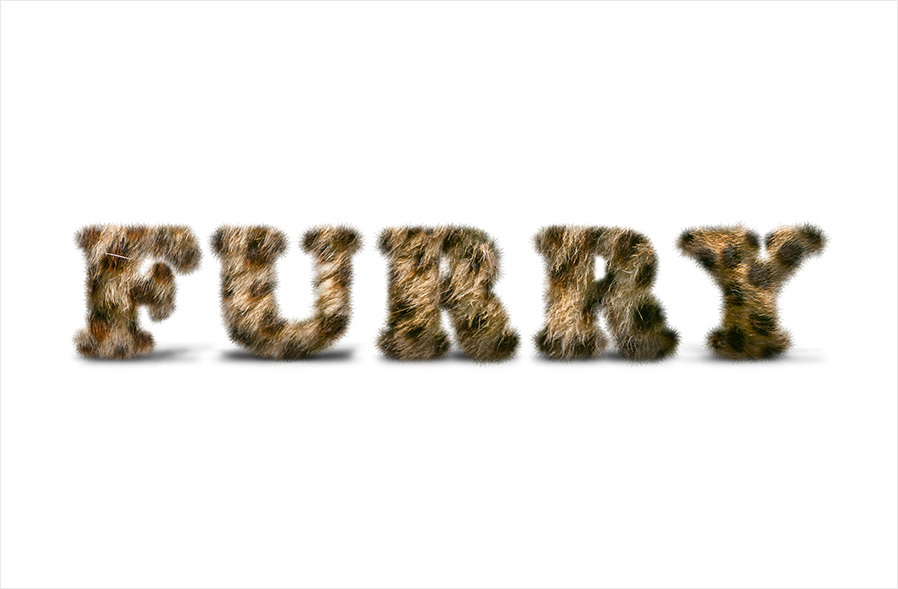
What you’ll be creating
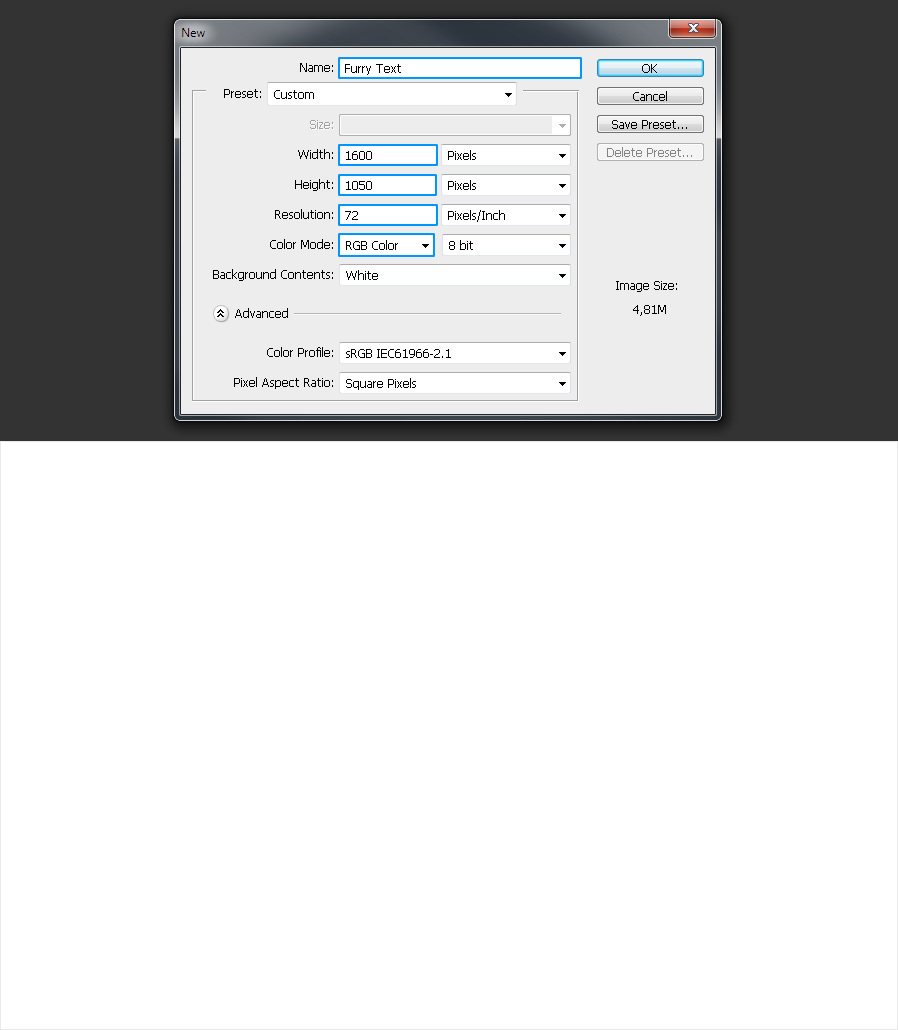
![](https://s3.medialoot.com/blog-images/How-to-create-a-furry-text-in-Photoshop/00b.jpg?mtime=20181122123918)
Step 1
Open Photoshop and make a new document. I will setup mine at 1600 x 1050 px for the dimensions, but you can use any size you want depending on the text you will type.
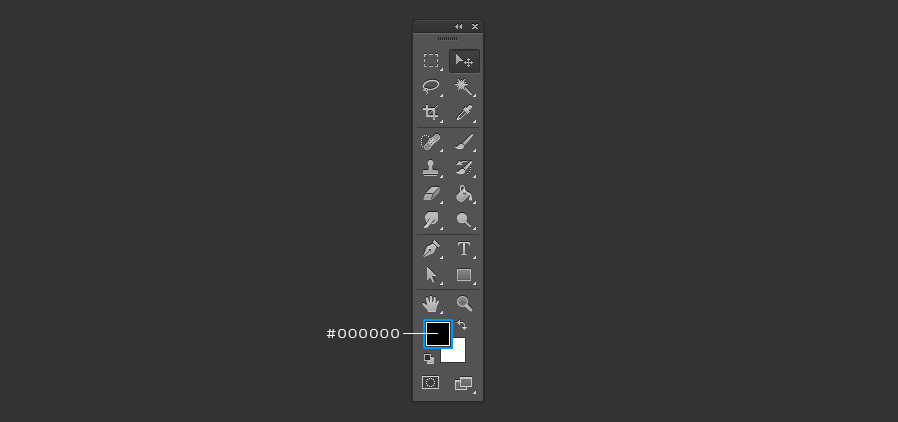
![](https://s3.medialoot.com/blog-images/How-to-create-a-furry-text-in-Photoshop/01b.jpg?mtime=20181122123243)
Step 2
Set the Foreground color to Black.
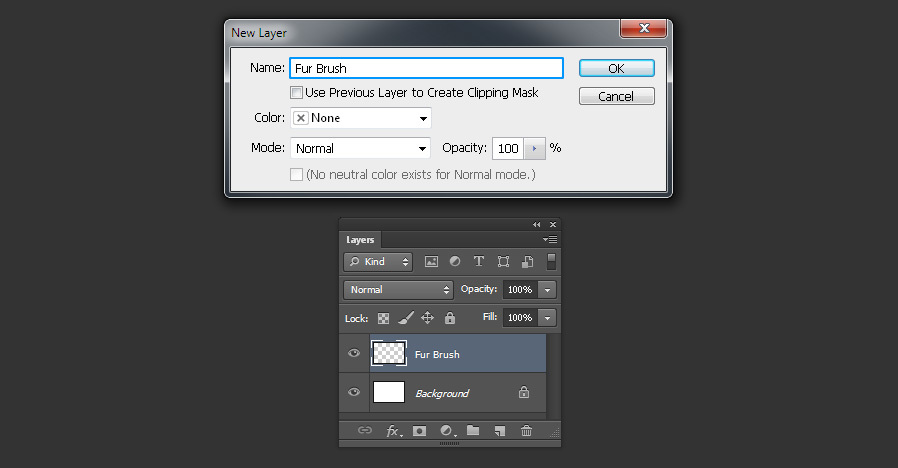
![](https://s3.medialoot.com/blog-images/How-to-create-a-furry-text-in-Photoshop/02.jpg?mtime=20181122121452)
Step 3
Go to Layer > New > Layer. Name this layer as “Fur Brush” and click OK.
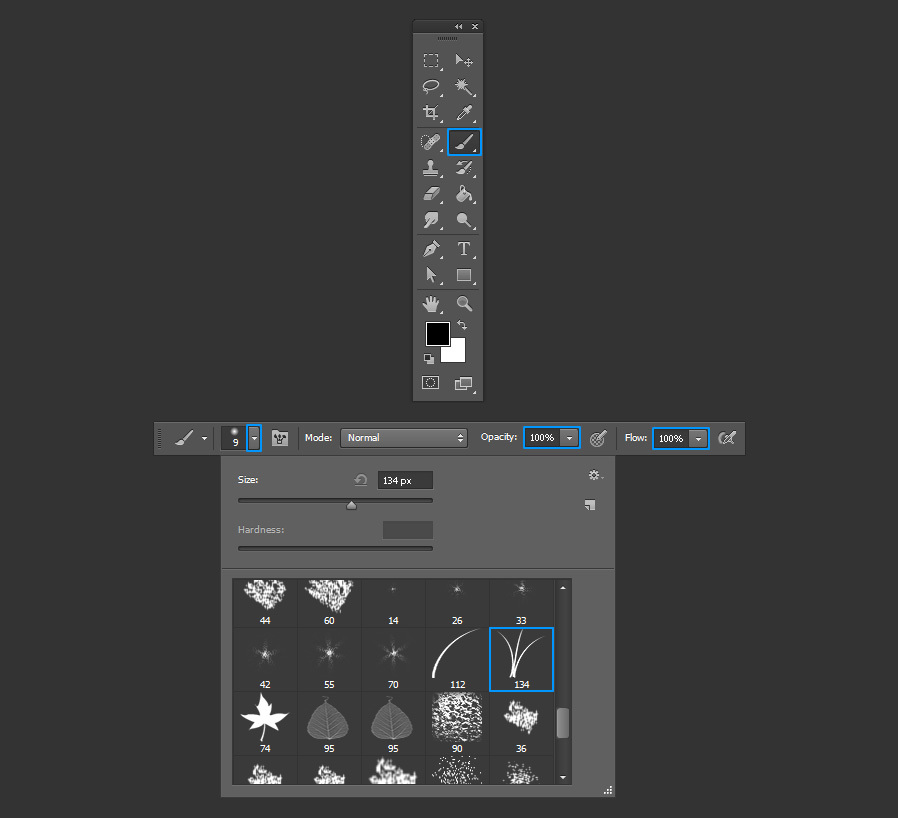
![](https://s3.medialoot.com/blog-images/How-to-create-a-furry-text-in-Photoshop/03.jpg?mtime=20181122121454)
Step 4
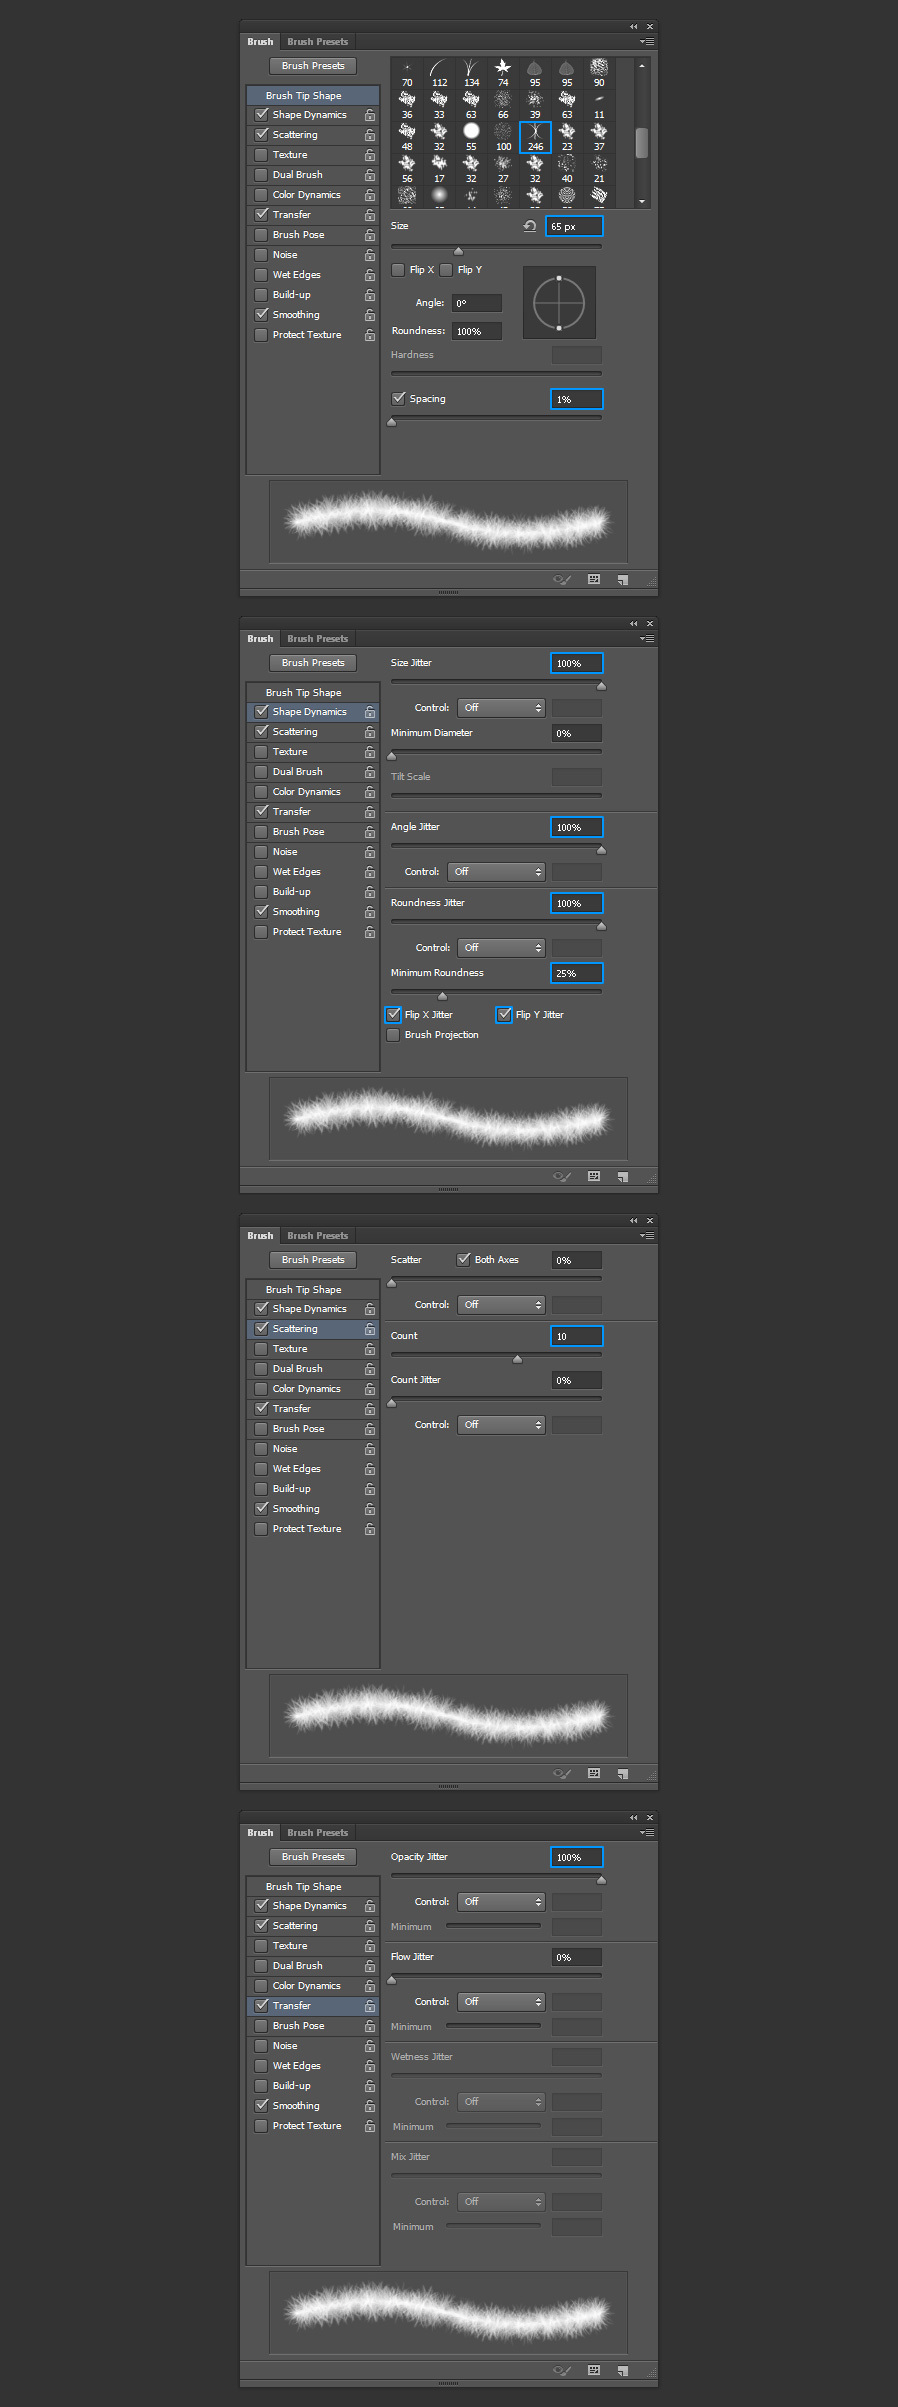
Select the Brush Tool (B) and from the Brush Preset Picker in the top toolbar, select the “Grass” one. Be sure to have the Opacity and Flow set to 100%.
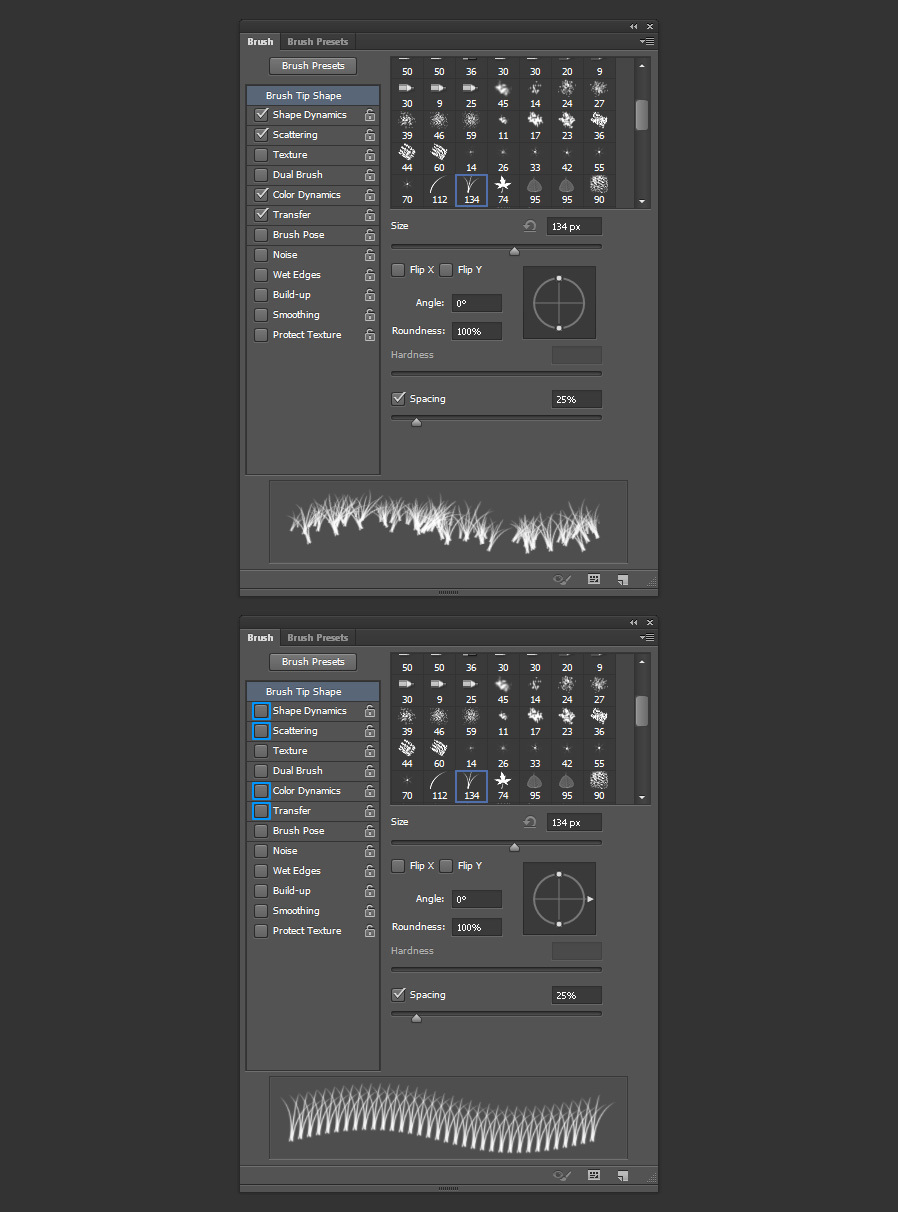
![](https://s3.medialoot.com/blog-images/How-to-create-a-furry-text-in-Photoshop/04.jpg?mtime=20181122121455)
Step 5
Go to Window > Brush. In the Brush window, be sure to uncheck all the default options of this brush.
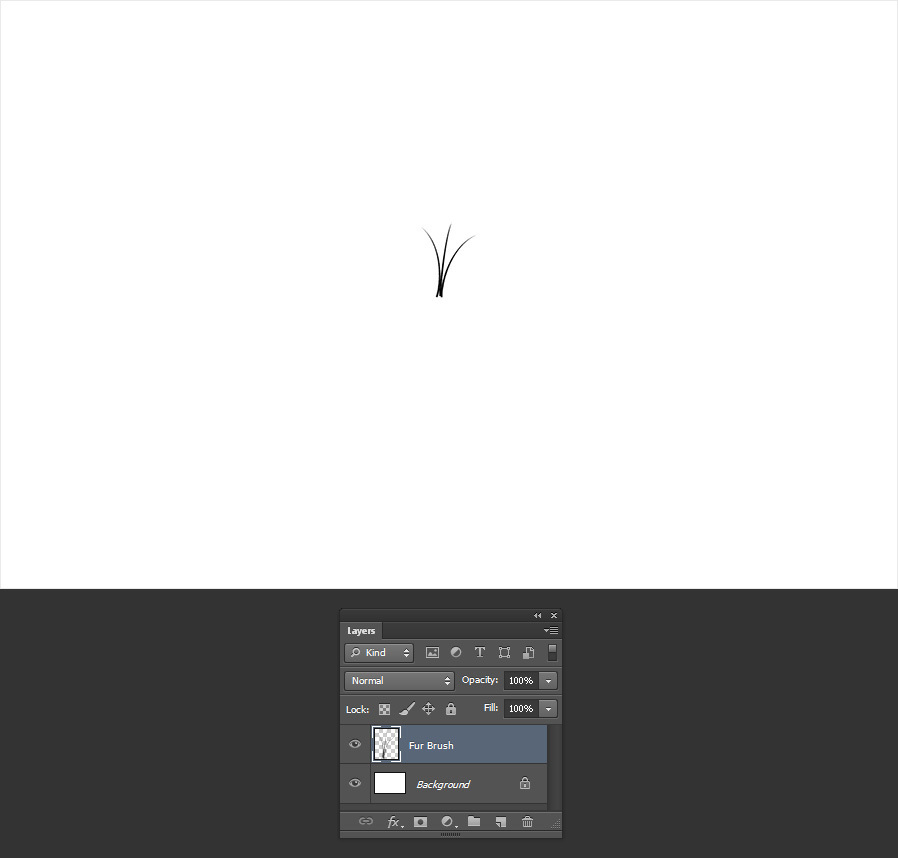
![](https://s3.medialoot.com/blog-images/How-to-create-a-furry-text-in-Photoshop/05.jpg?mtime=20181122121456)
Step 6
With the Brush Tool selected, click once over the canvas.
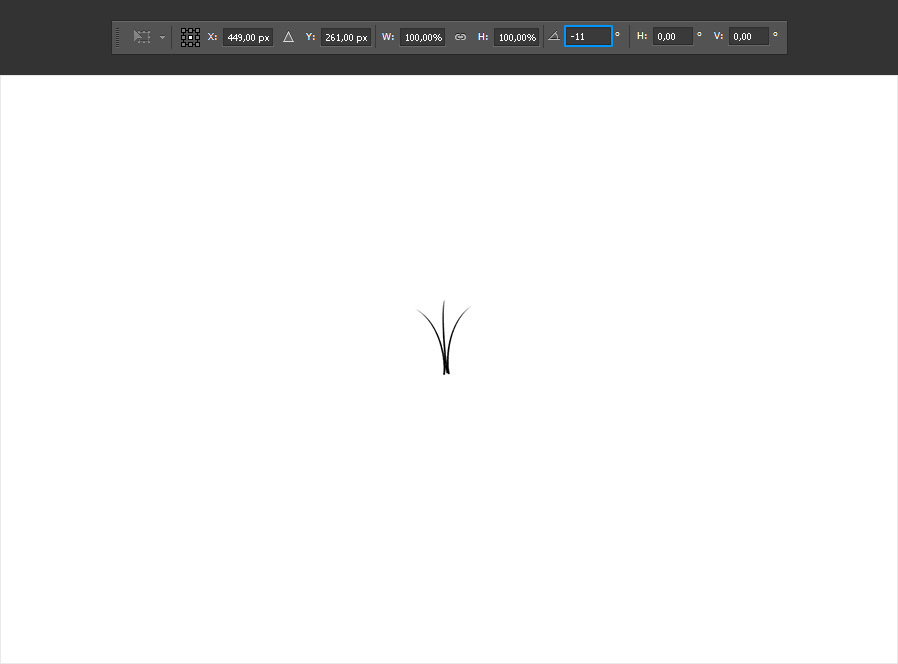
![](https://s3.medialoot.com/blog-images/How-to-create-a-furry-text-in-Photoshop/06b.jpg?mtime=20181122123919)
Step 7
Go to Edit > Transform > Rotate. Set the angle to -11º and hit the enter key on your keyboard to commit the changes.
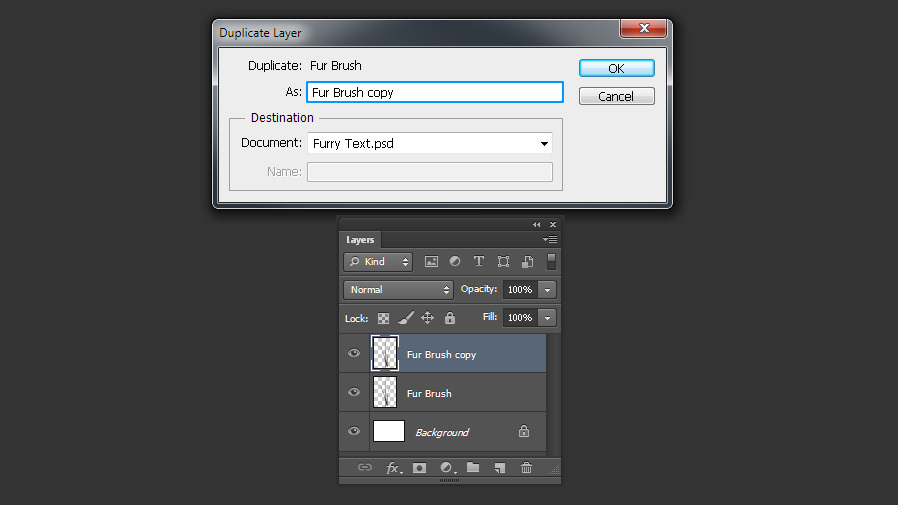
![](https://s3.medialoot.com/blog-images/How-to-create-a-furry-text-in-Photoshop/07b.jpg?mtime=20181122123920)
Step 8
Go to Layer > Duplicate Layer. Name this layer as Fur Brush copy and click OK.
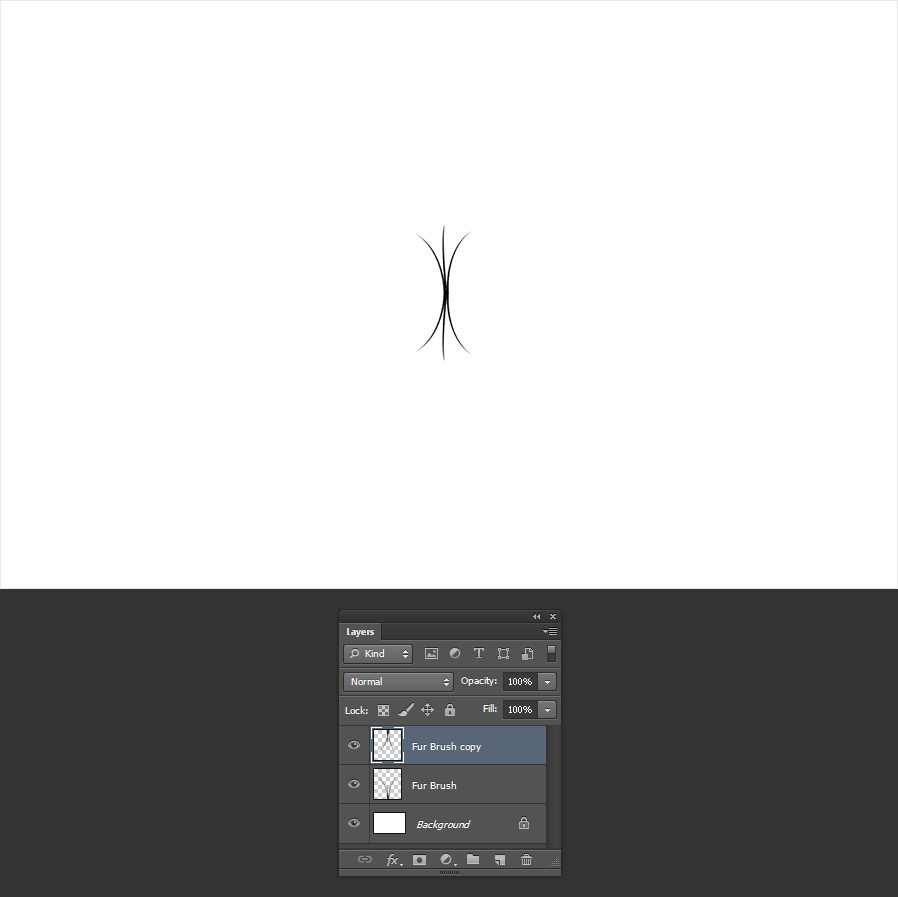
![](https://s3.medialoot.com/blog-images/How-to-create-a-furry-text-in-Photoshop/08.jpg?mtime=20181122121459)
Step 9
Go to Edit > Transform > Flip Vertical and position the new layer as shown.
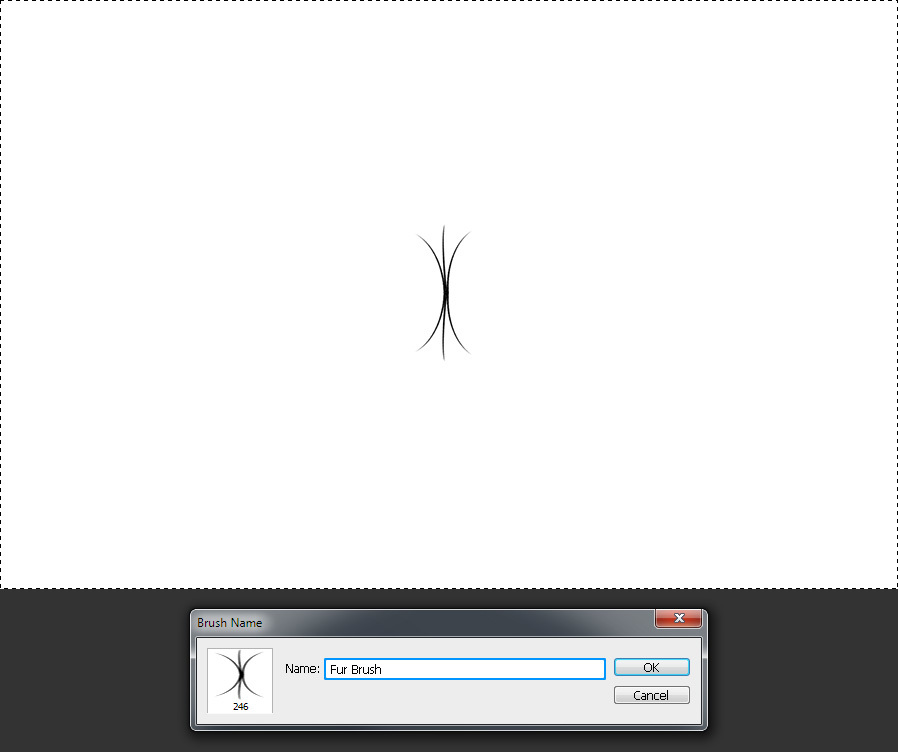
![](https://s3.medialoot.com/blog-images/How-to-create-a-furry-text-in-Photoshop/09b.jpg?mtime=20181122123921)
Step 10
Go to Select > All and then to Edit > Define Brush Preset. Name the new brush as “Fur Brush” and click OK.
![](https://s3.medialoot.com/blog-images/How-to-create-a-furry-text-in-Photoshop/10.jpg?mtime=20181122121501)
Step 11
Go to Select > Deselect and delete both “Fur Brush” layers.
![](https://s3.medialoot.com/blog-images/How-to-create-a-furry-text-in-Photoshop/11b.jpg?mtime=20181122123244)
Step 12
With the Brush Tool (B) selected go to Window > Brush. In the brush window, select the “Fur Brush” we just made and apply the following settings:
![](https://s3.medialoot.com/blog-images/How-to-create-a-furry-text-in-Photoshop/12.jpg?mtime=20181122121504)
Step 13
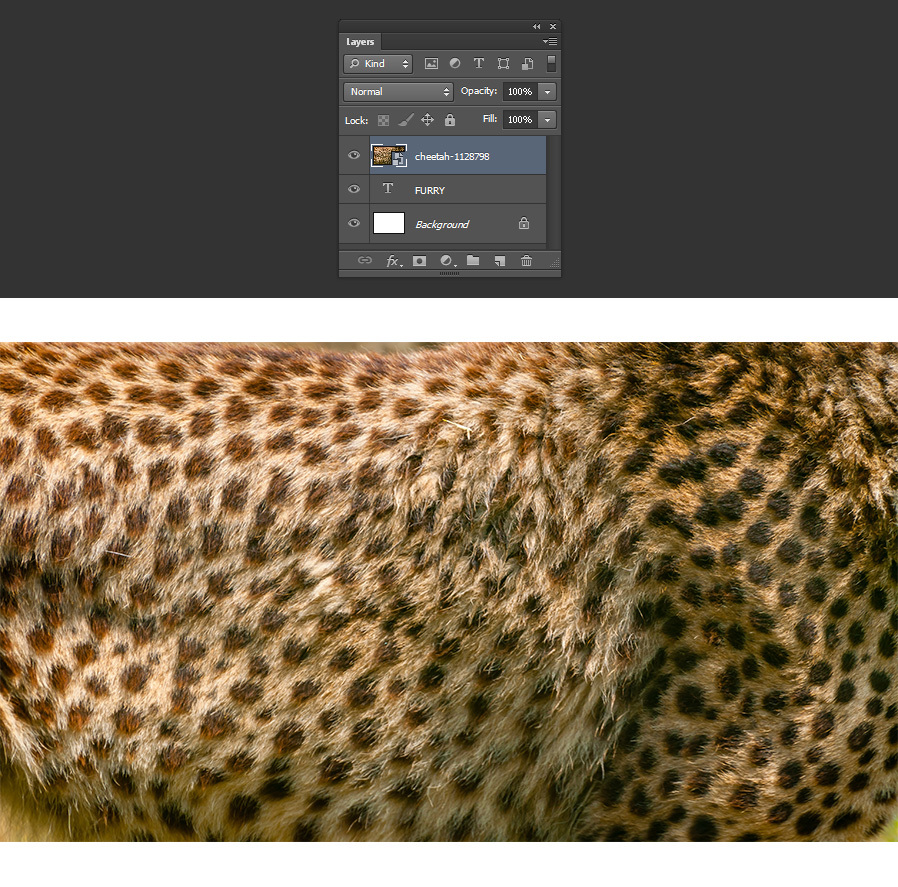
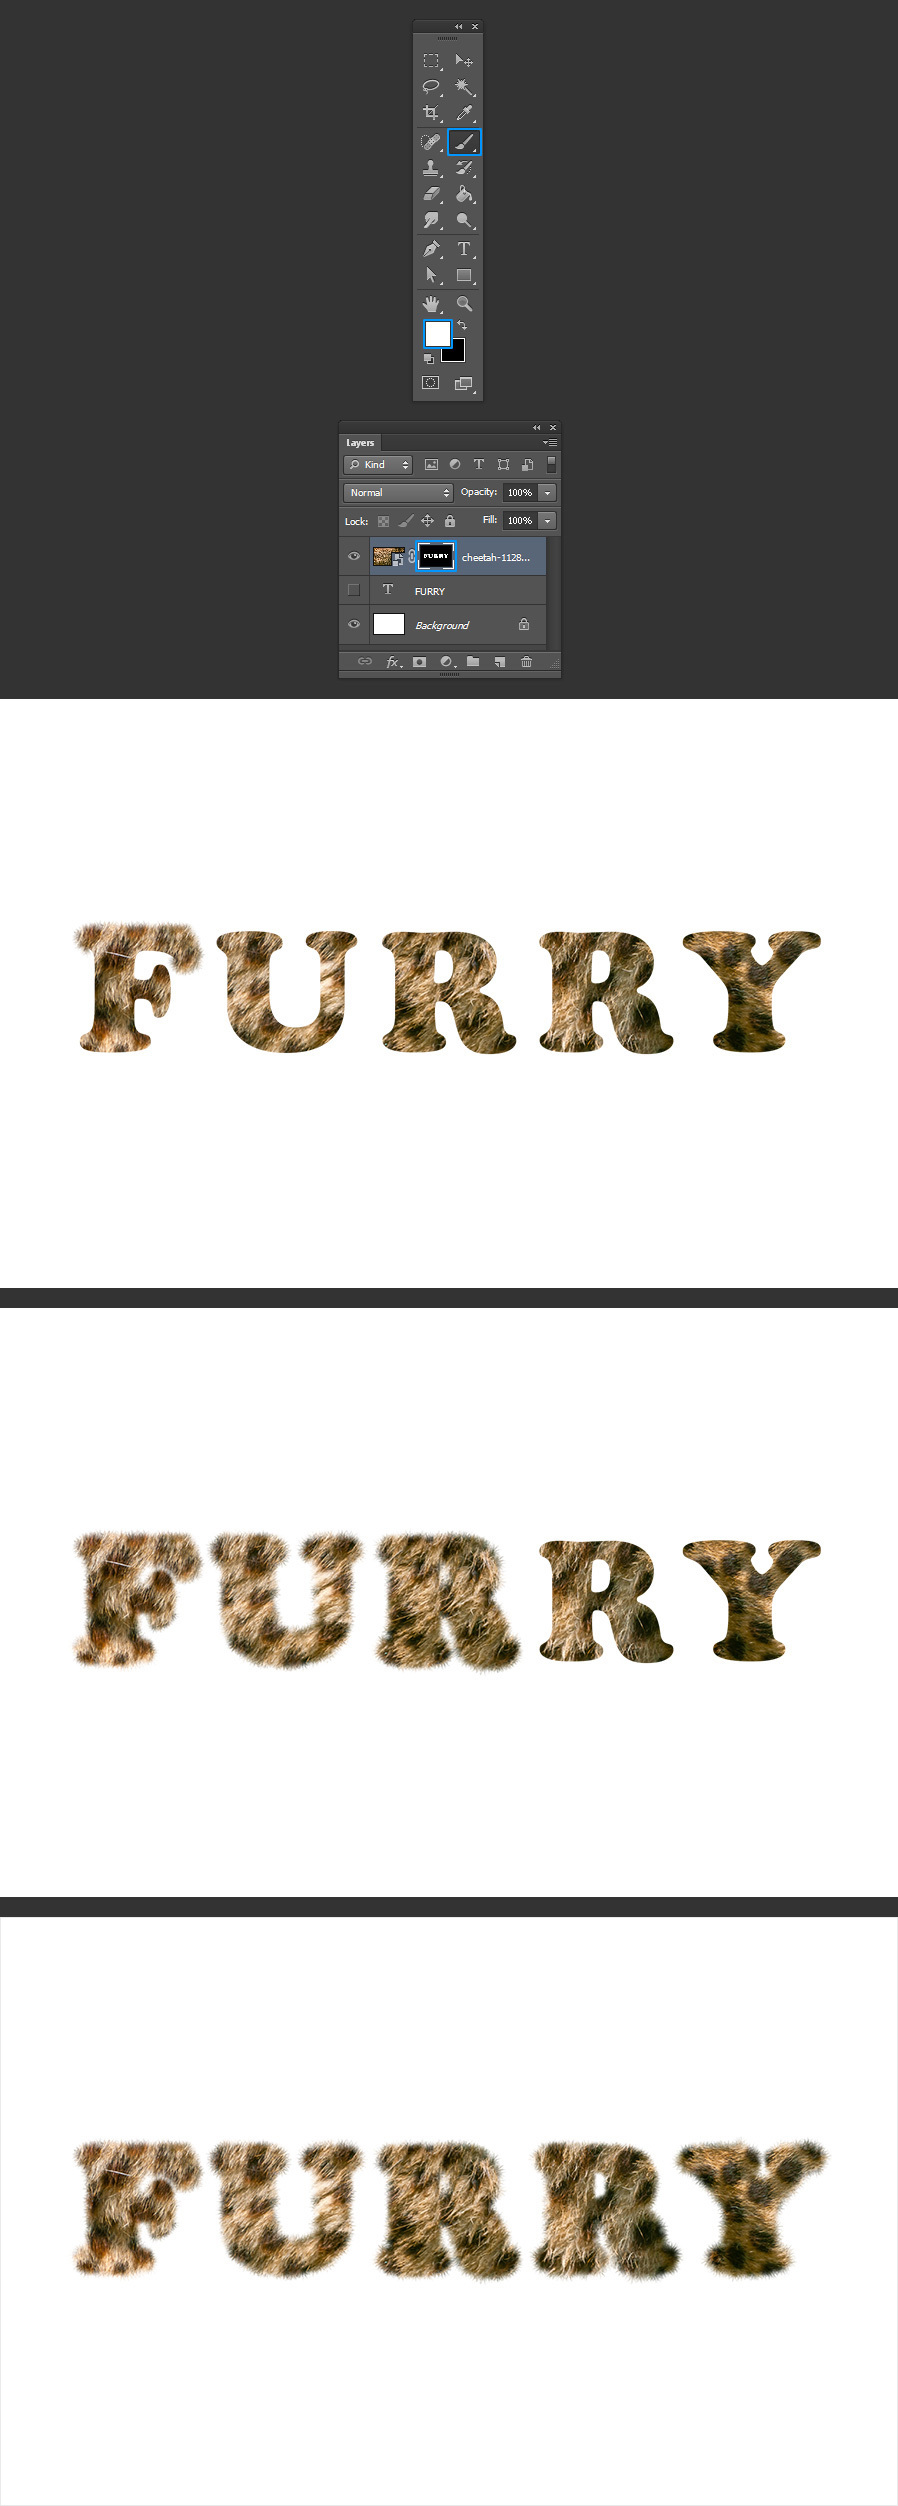
Type your text in a new layer.
![](https://photoshopwizards.com/wp-content/uploads/2023/09/image-32.png)
Step 14
Go to File > Place. Locate the “Cheetah fur texture” and click on Place. Position the image to cover the whole text and hit the Enter key on your keyboard to commit the changes.
![](https://s3.medialoot.com/blog-images/How-to-create-a-furry-text-in-Photoshop/14.jpg?mtime=20181122121508)
Step 15
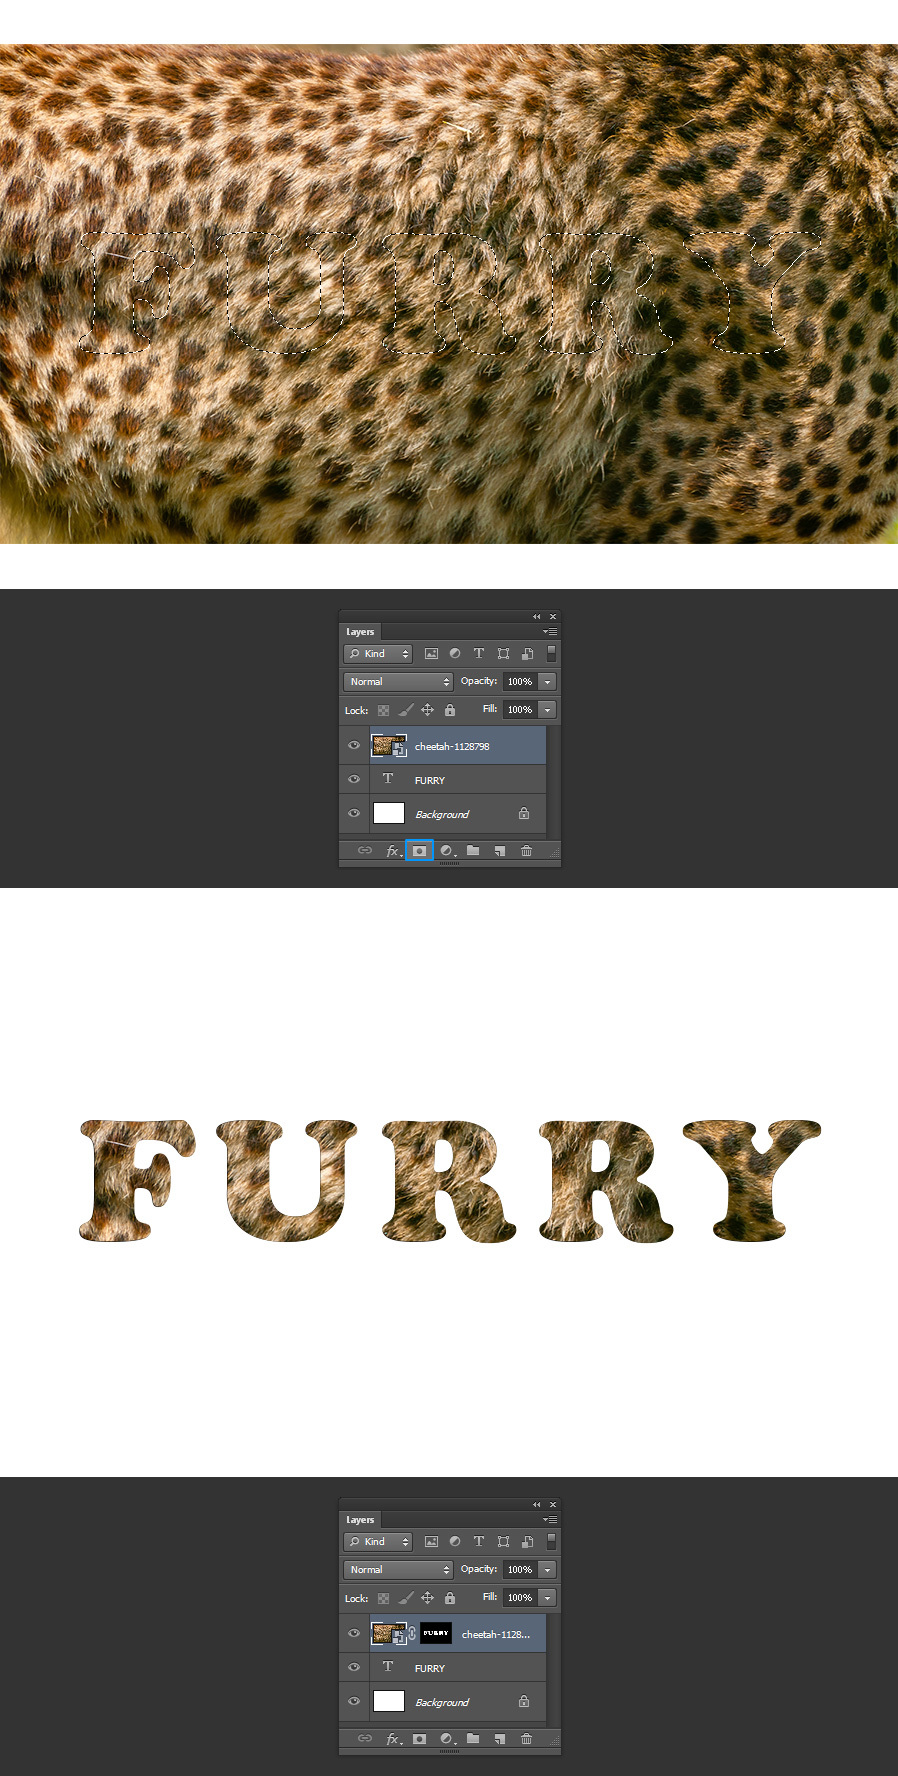
Hold the Ctrl key on your keyboard and click over the “T” icon of the text layer.
![](https://s3.medialoot.com/blog-images/How-to-create-a-furry-text-in-Photoshop/15.jpg?mtime=20181122121510)
Step 16
With the selection active, click on the Add Layer Mask icon in the layers panel.
![](https://s3.medialoot.com/blog-images/How-to-create-a-furry-text-in-Photoshop/16.jpg?mtime=20181122121514)
Step 17
Hide the text layer and click the Layer Mask Thumbnail of the texture layer.
![](https://s3.medialoot.com/blog-images/How-to-create-a-furry-text-in-Photoshop/17b.jpg?mtime=20181122123923)
Step 18
Select the Brush Tool (B) and be sure that the foreground color is set to White. Now simply start brushing around the letters as shown:
![](https://s3.medialoot.com/blog-images/How-to-create-a-furry-text-in-Photoshop/18b.jpg?mtime=20181122123925)
Step 19
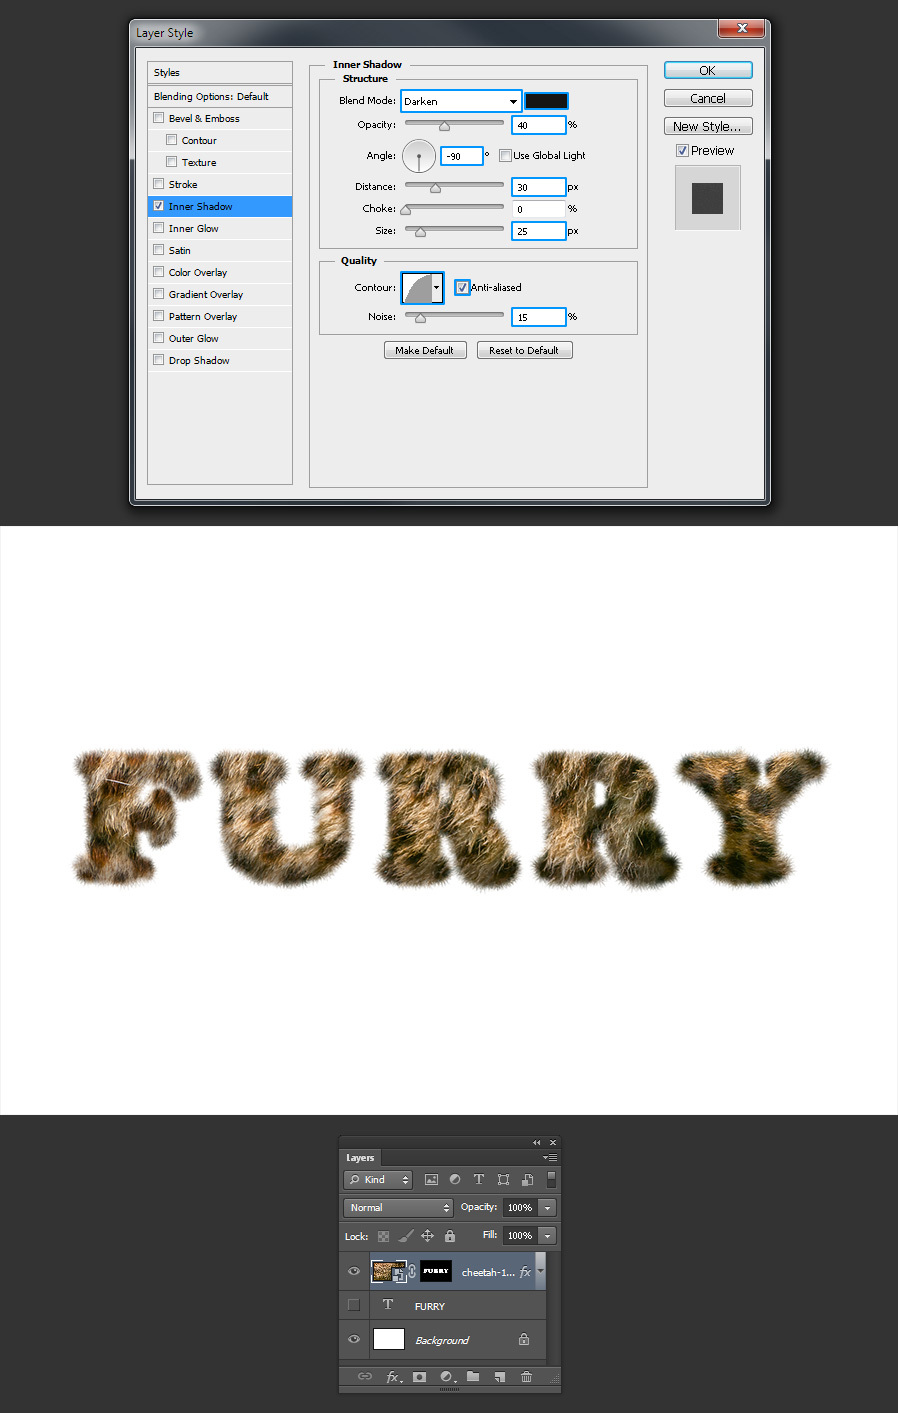
Go to Layer > Layer Style > Inner Shadow. Apply the following settings and click OK.
![](https://s3.medialoot.com/blog-images/How-to-create-a-furry-text-in-Photoshop/19.jpg?mtime=20181122121522)
Step 20
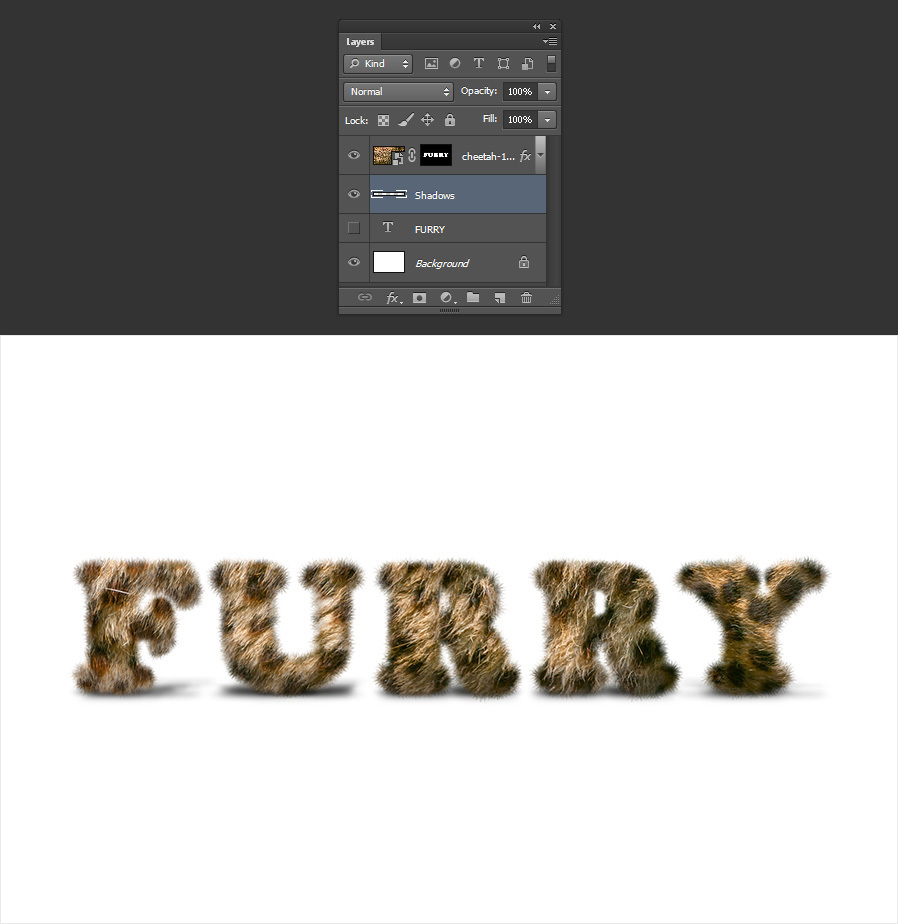
Optionally, to give the text some final touches you can add some shadows in a layer below the texture or simply leave it as is.
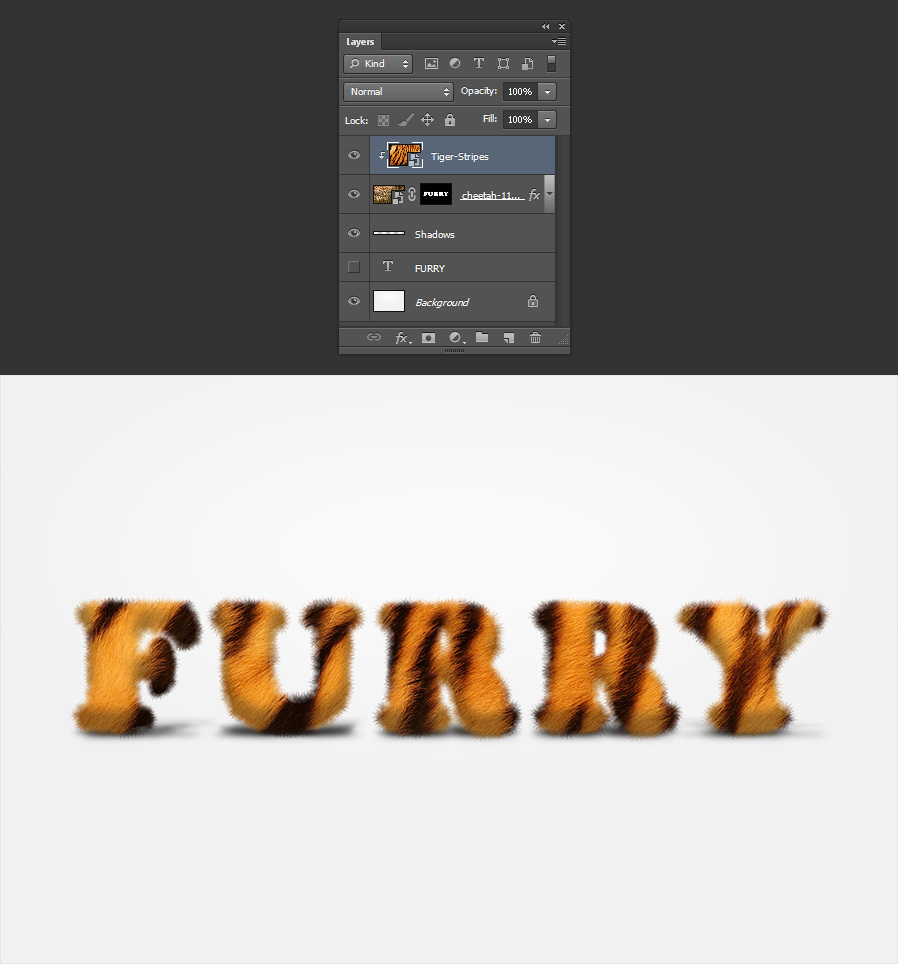
![](https://s3.medialoot.com/blog-images/How-to-create-a-furry-text-in-Photoshop/20b.jpg?mtime=20181122123927)
A Final Tip
If you want to change the fur texture, simply place the new texture on top of the one we did and go to Layer > Create Clipping Mask.
![](https://s3.medialoot.com/blog-images/How-to-create-a-furry-text-in-Photoshop/21.jpg?mtime=20181122121525)