How to Make a Debossed Leather Effect in Photoshop

Step 1
Open the leather background image in Photoshop.

Step 2
Go to File > Place Embedded. Locate your design file on your computer and click Place.

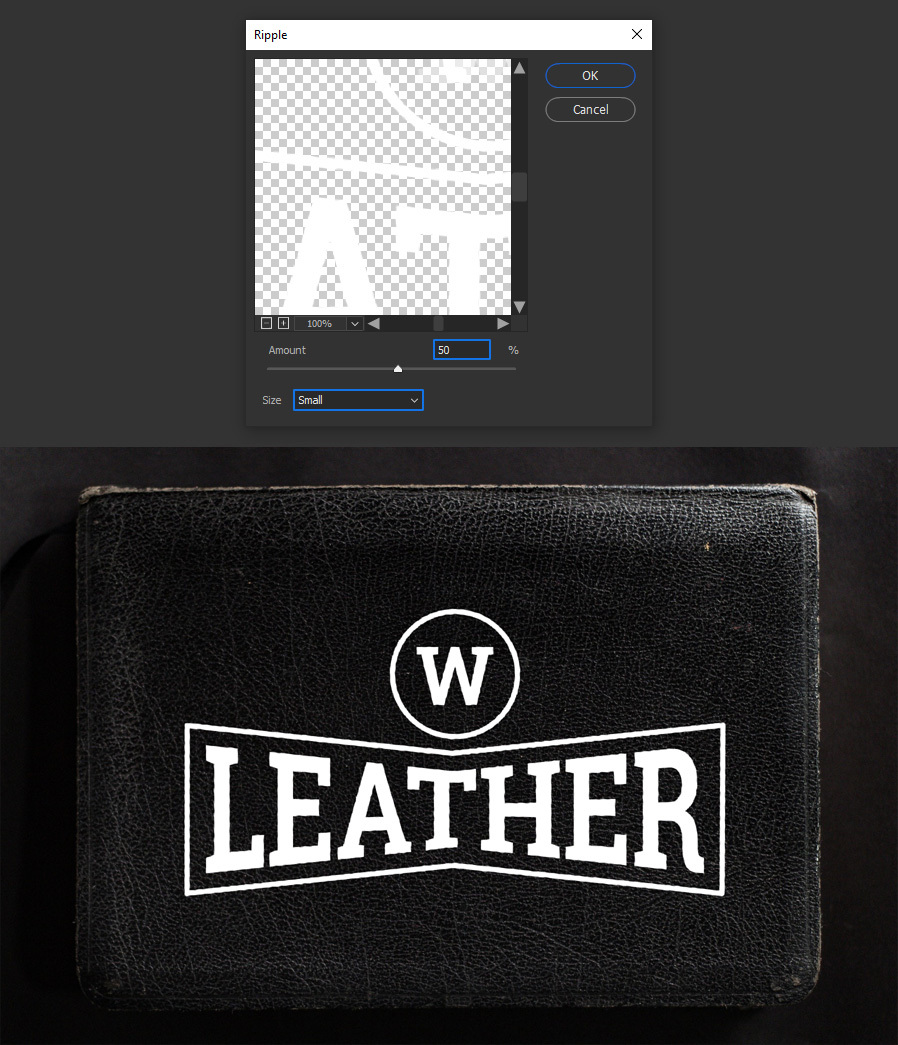
Step 3
With the design layer selected go to Filter > Distort > Ripple. Set the Amount to 50%, the size to Small and click OK.
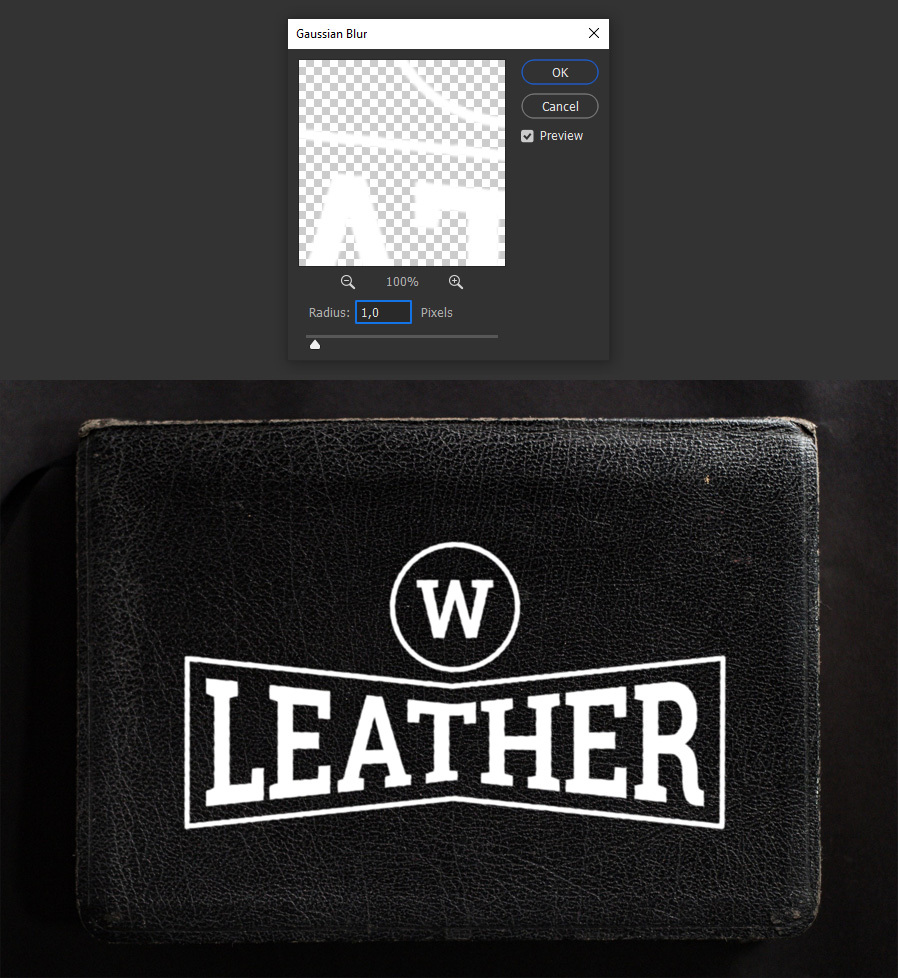
Step 4
Go to Filter > Blur > Gaussian Blur. Set the Radius to 1 and click OK.
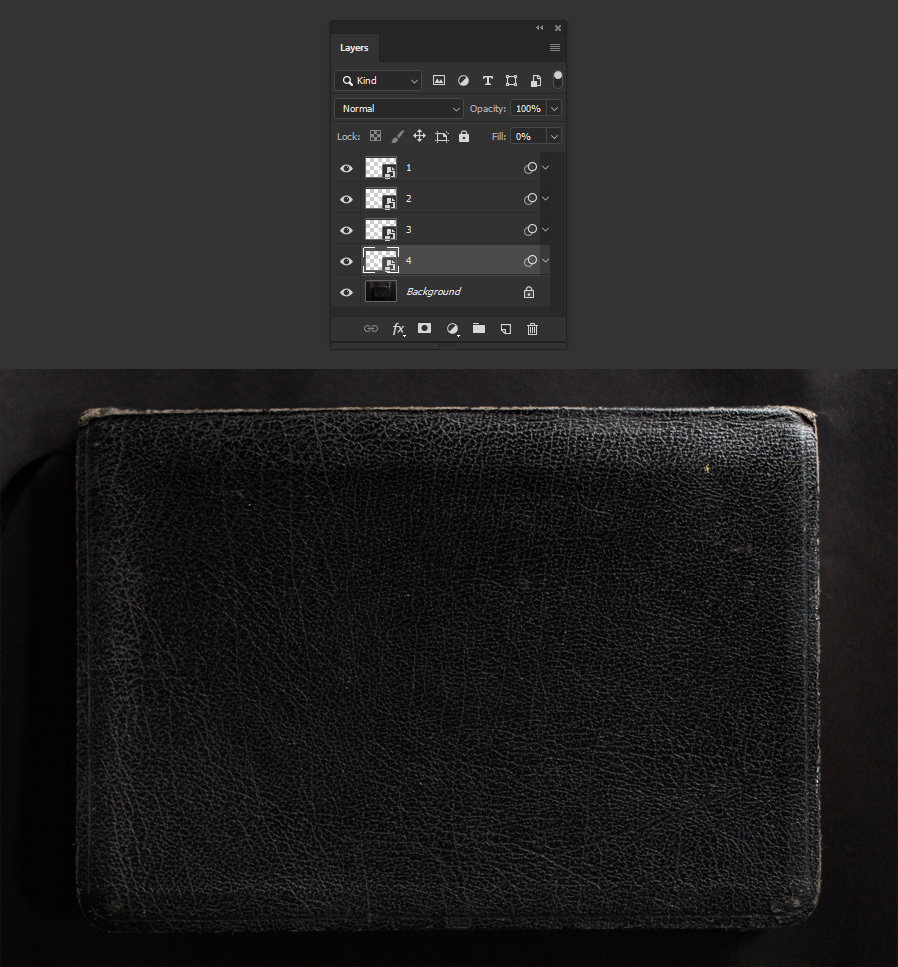
Step 5
Set the layer Fill to 0%.

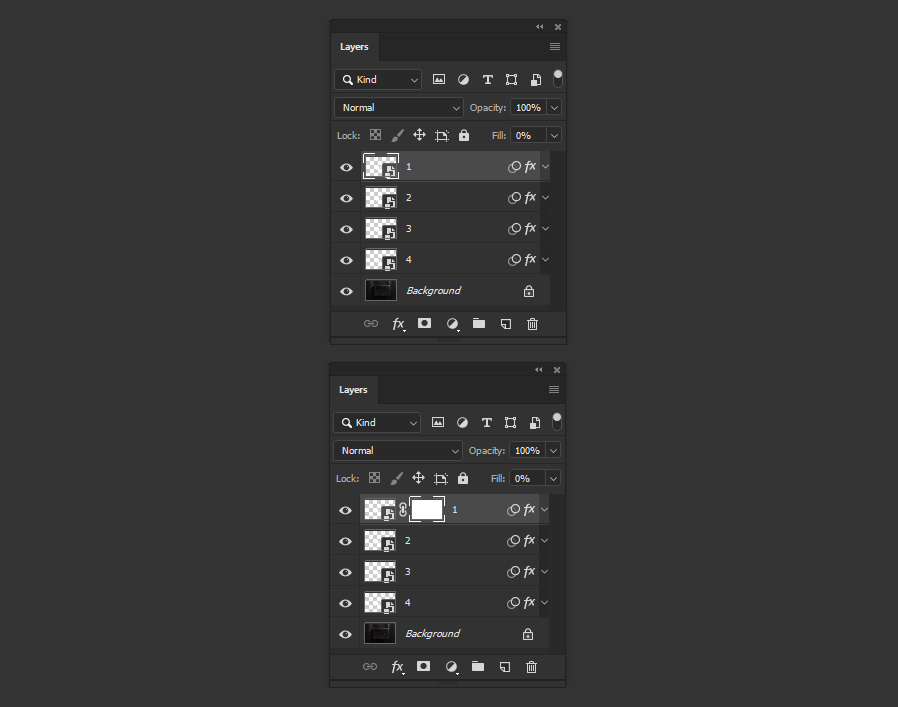
Step 6
Press Ctrl+J on your keyboard 3 times to make 3 copies of your design and rename the layers to 1, 2, 3 and 4.
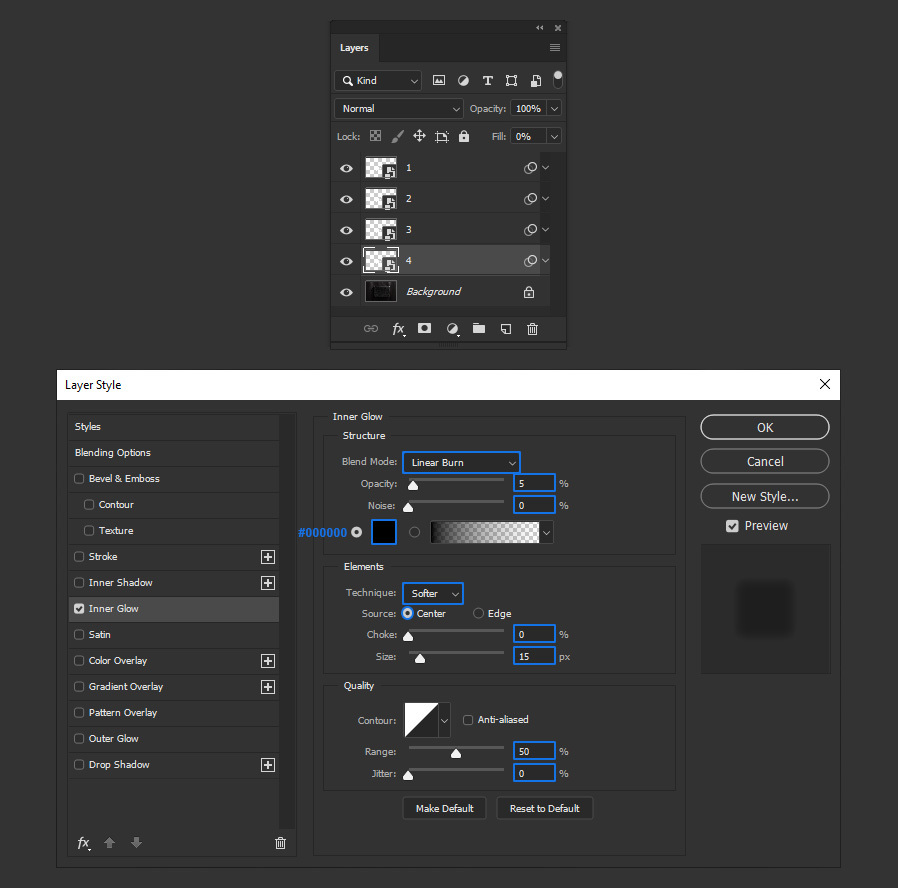
Step 7
Select the Layer 4, go to Layer > Layer Style > Inner Glow and apply the following settings.
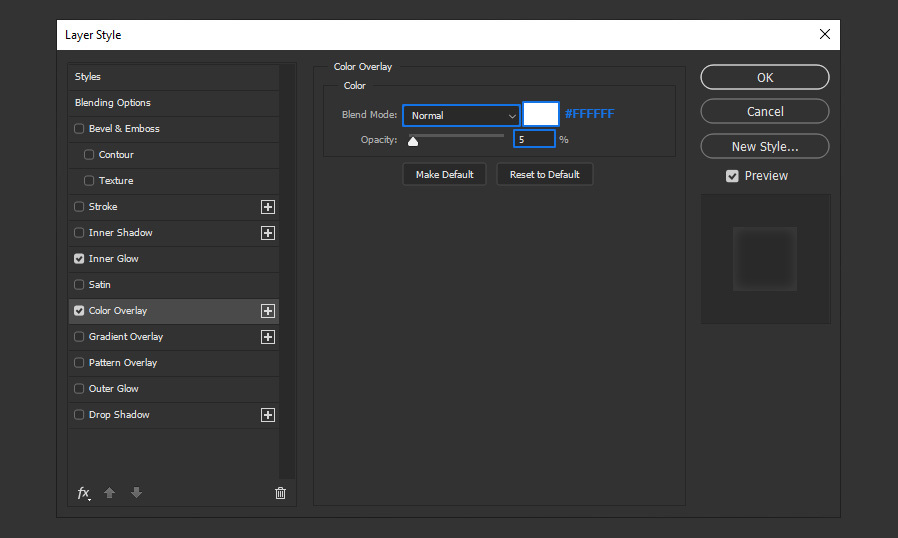
Step 8
Check the Color Overlay option and apply the following settings.
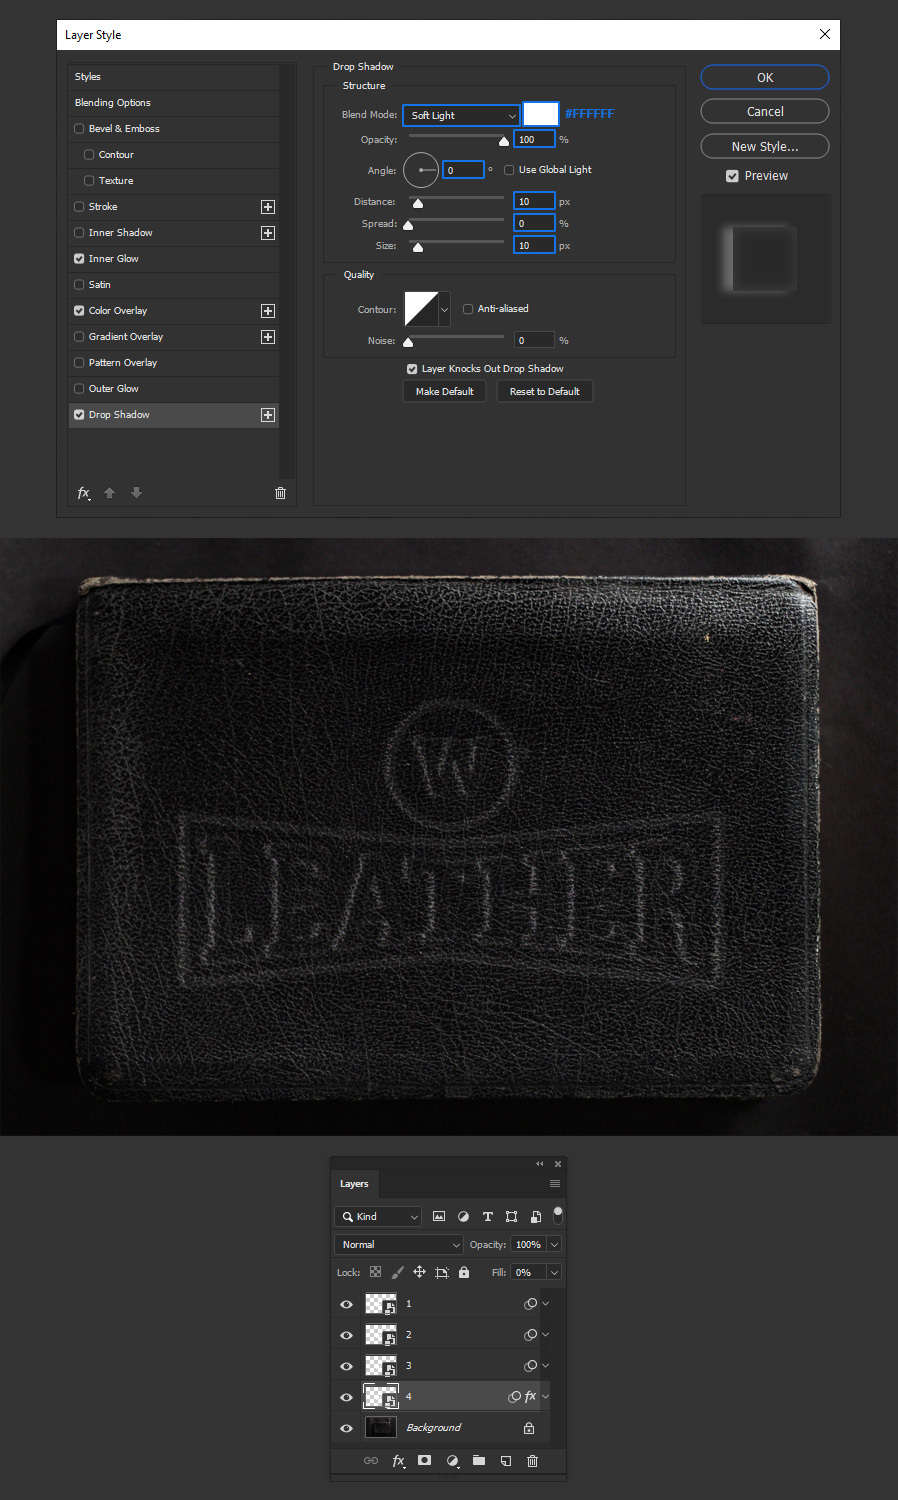
Step 9
Check the Drop Shadow option, apply the following settings and click OK.
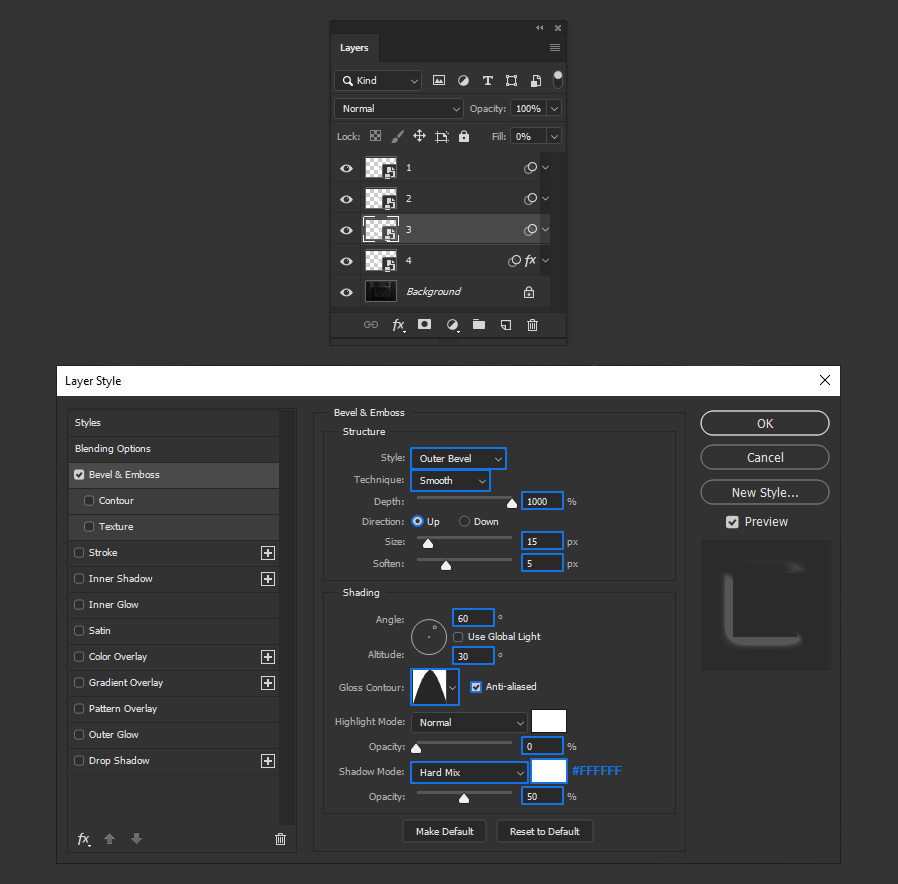
Step 10
Select the Layer 3, go to Layer > Layer Style > Bevel & Emboss and apply the following settings.
Note: In the Gloss Contour be sure to select the “Cone” shape from the dropdown thumbnails menu.
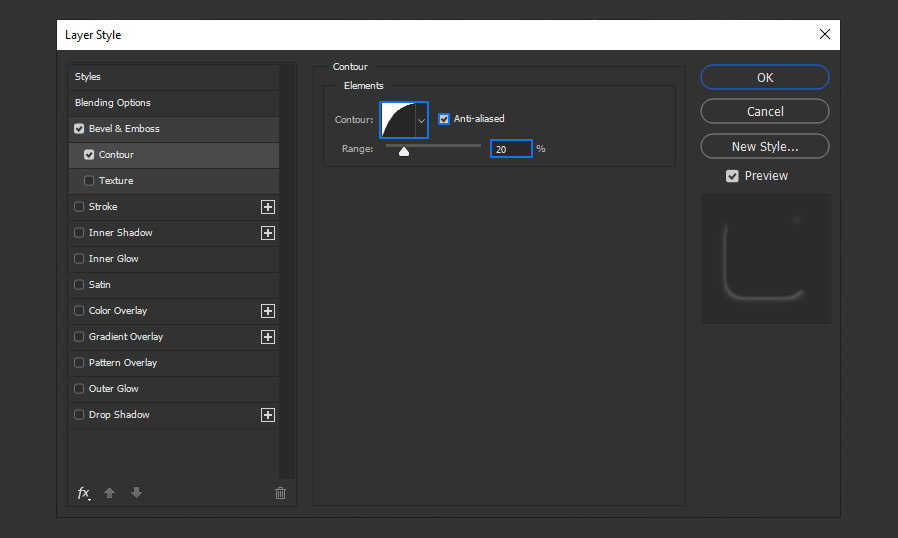
Step 11
Check the Contour and apply the following settings.
Note: In the Contour be sure to select the “Half Round” shape from the dropdown thumbnails menu.
Step 12
Check the Inner Shadow option, apply the following settings and click OK.
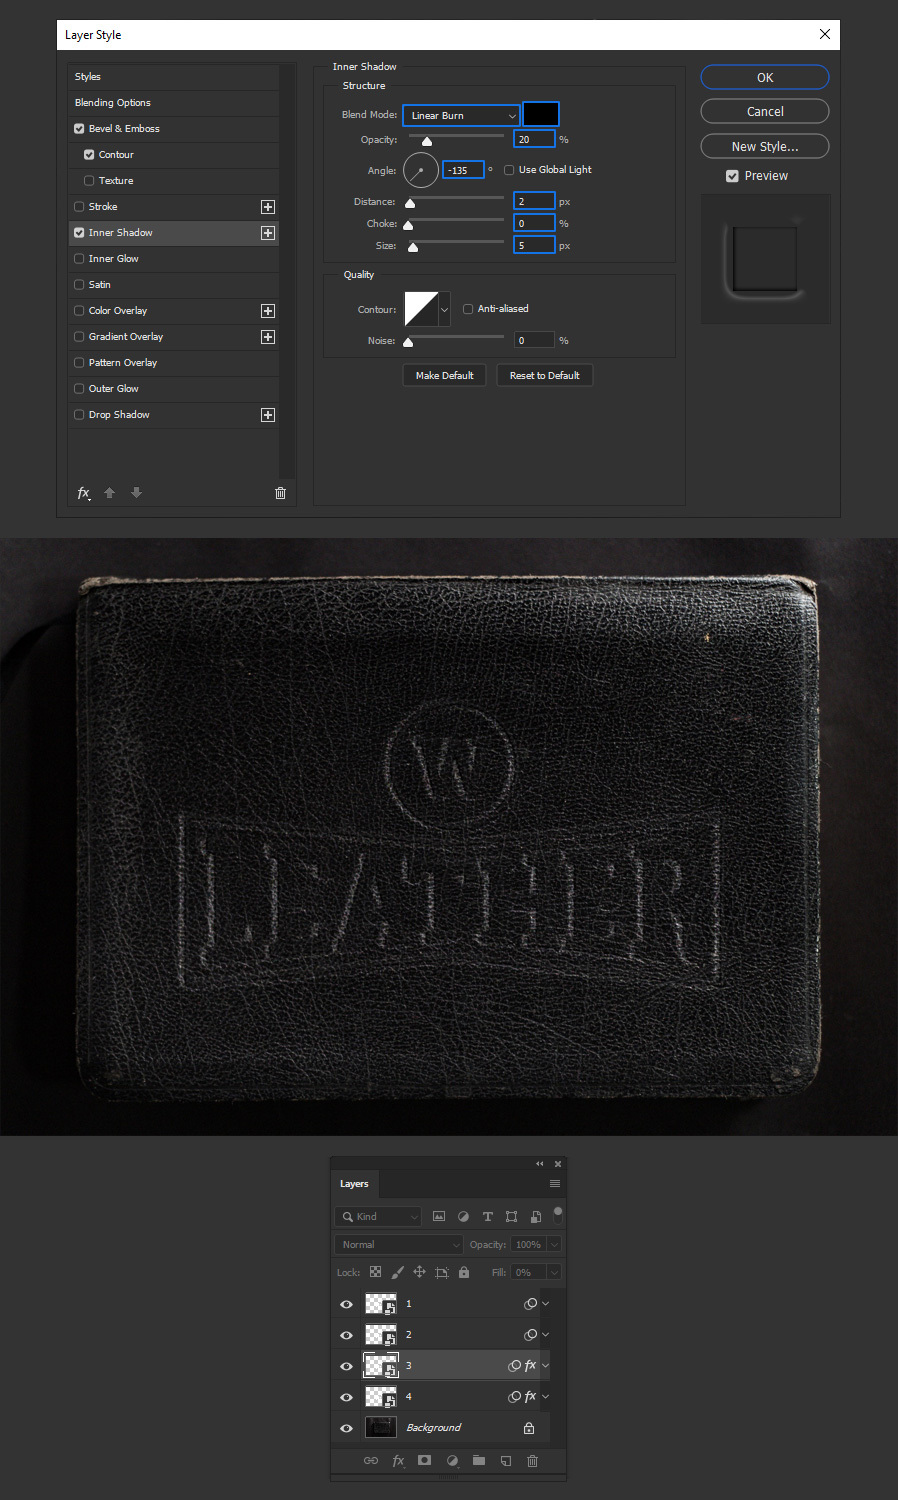
Step 13
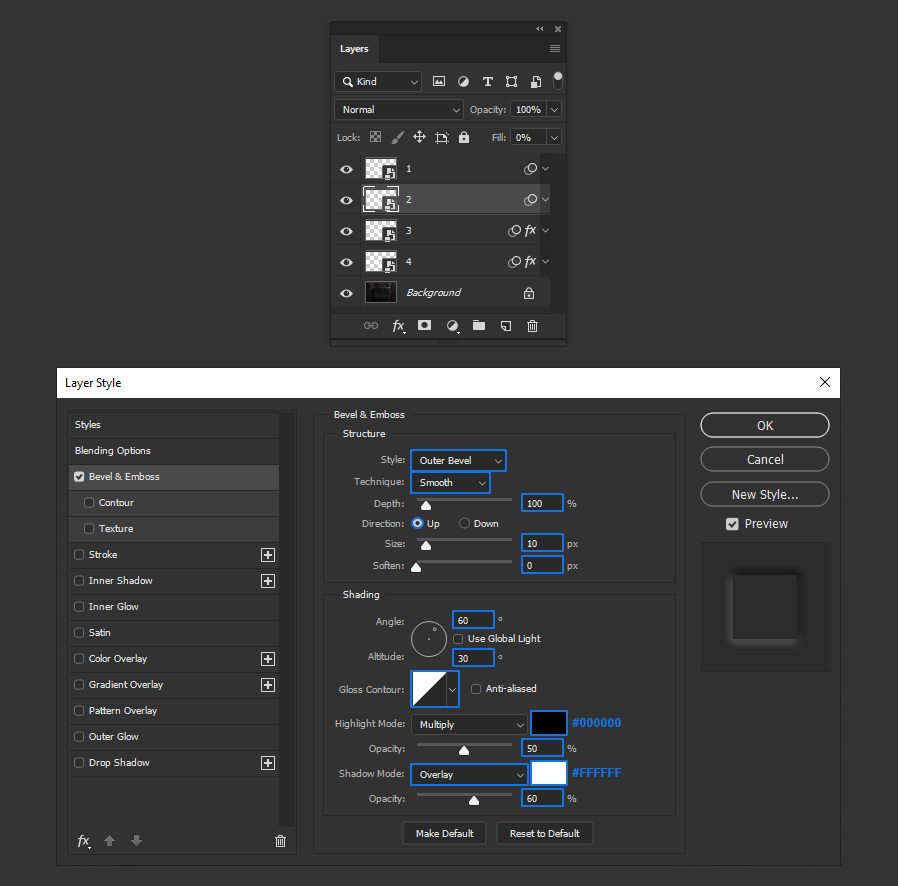
Select the Layer 2, go to Layer > Layer Style > Bevel & Emboss and apply the following settings.
Note: In the Gloss Contour be sure to select the “Linear” shape from the dropdown thumbnails menu.
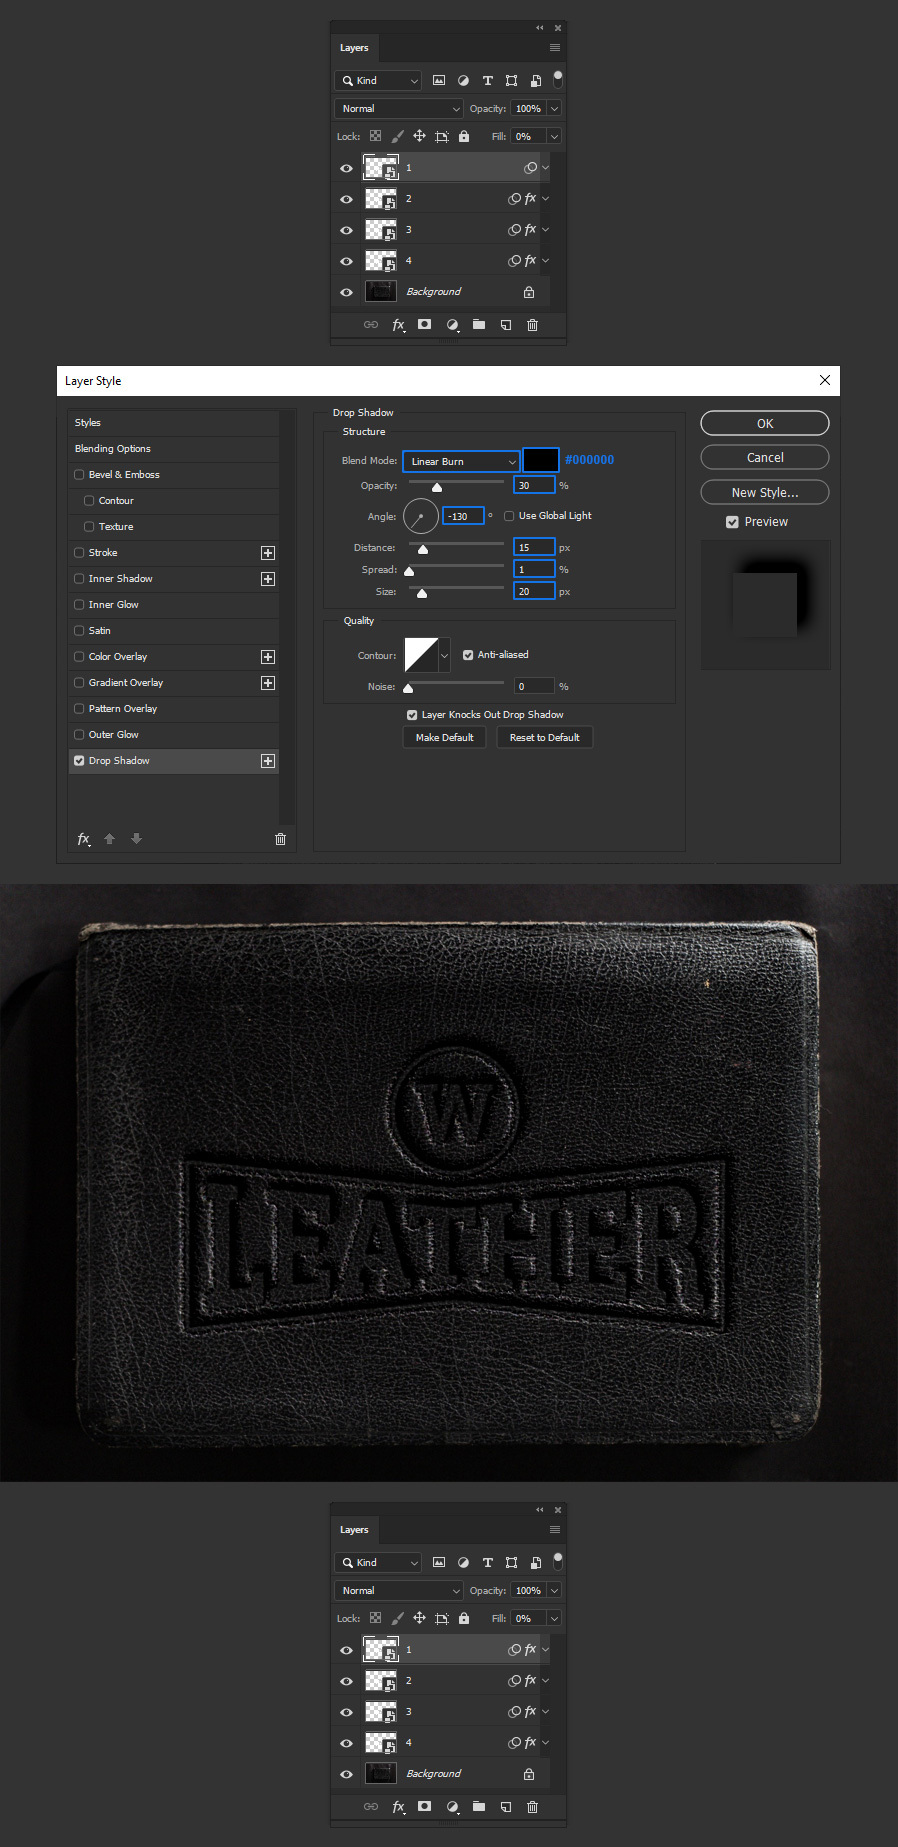
Step 14
Check the Drop Shadow option, apply the following settings and click OK.
Note: Under Contour be sure to select the “Rounded Steps” shape from the dropdown thumbnails menu.

Step 15
Select the Layer 1, go to Layer > Layer Style > Drop Shadow. Apply the following settings and click OK.
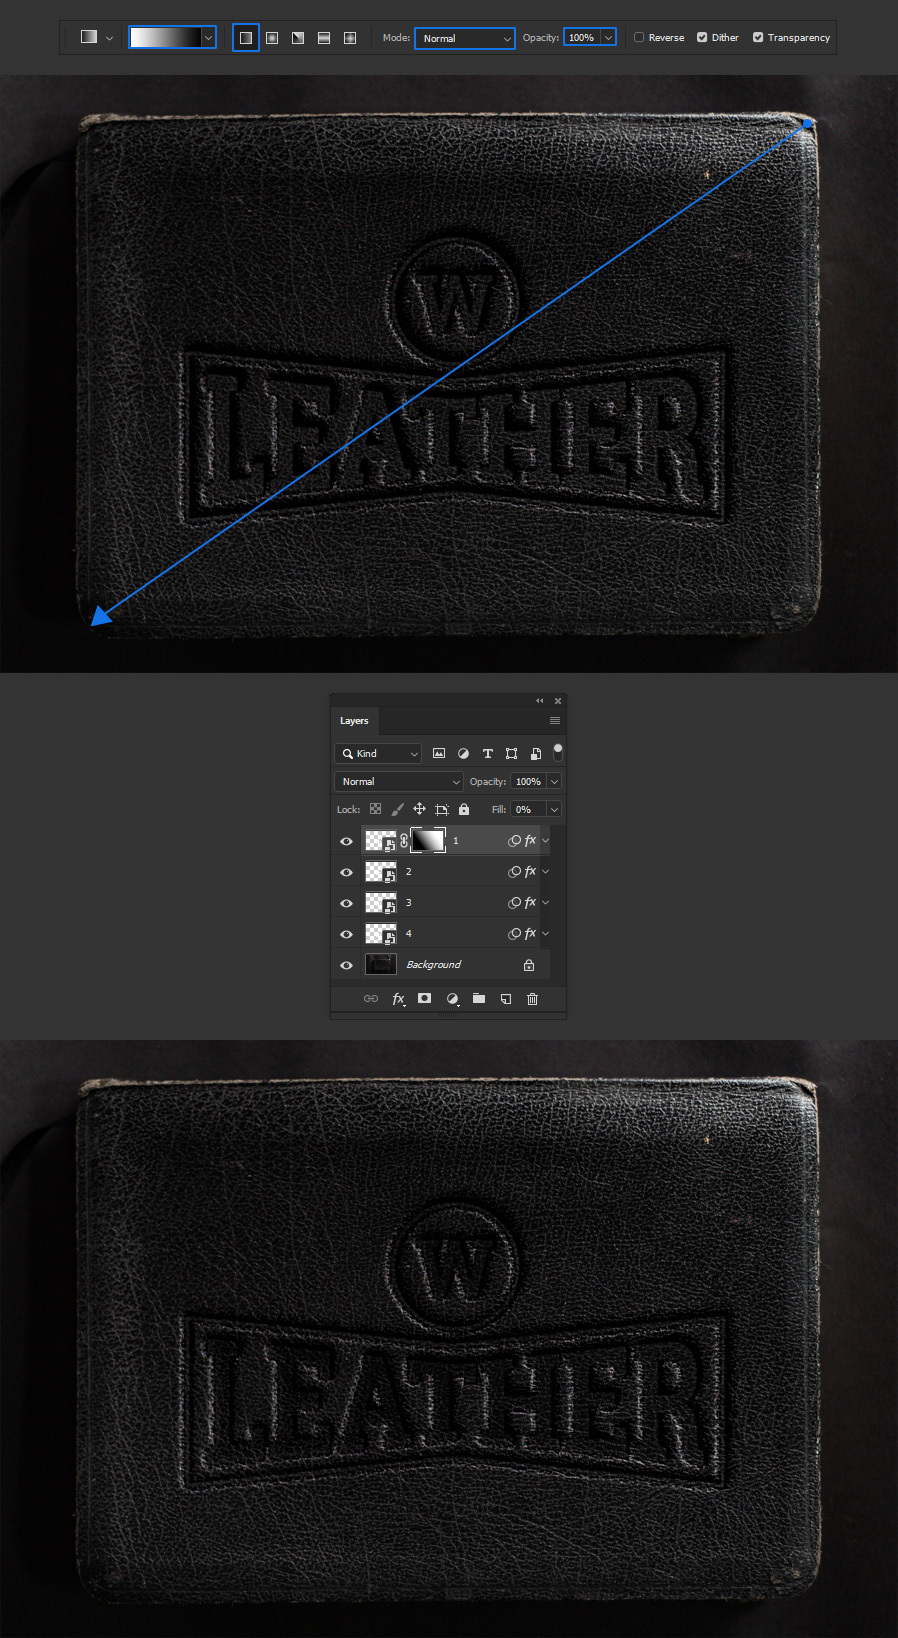
Step 16
With the Layer 1 selected, go to Layer > Layer Mask > Reveal All.
Step 17
Select the Gradient Tool (G) and be sure to have your Foreground color set to White and the Background color to Black.
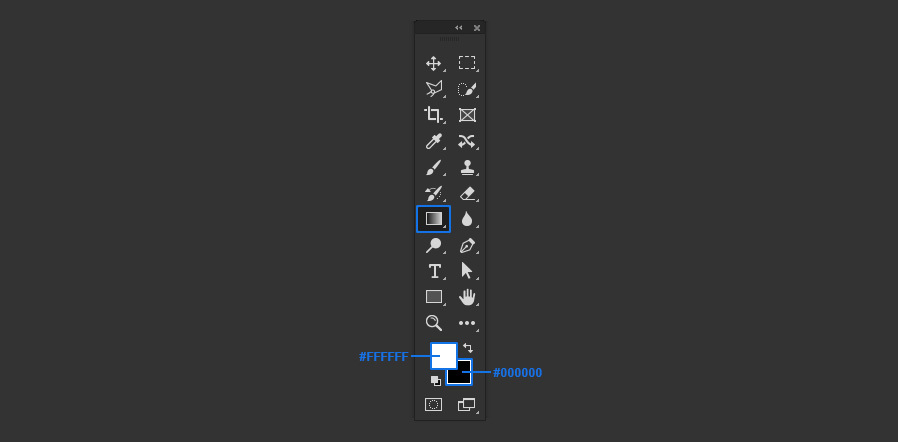
Step 18
Lastly, select the Foreground to Background gradient in the top toolbar. Click and drag over the canvas following the light direction (which in this case is near 145 degrees).