How to Make a Pink & Blue Effect in Photoshop

Step 1
Open the picture in Photoshop.
Step 2
Press “Ctrl+J” on your keyboard to make a copy of the Background layer.

Step 3
Go to Layer > Smart Objects > Convert to Smart Object.

Step 4
Go to Filter > Camera RAW Filter.

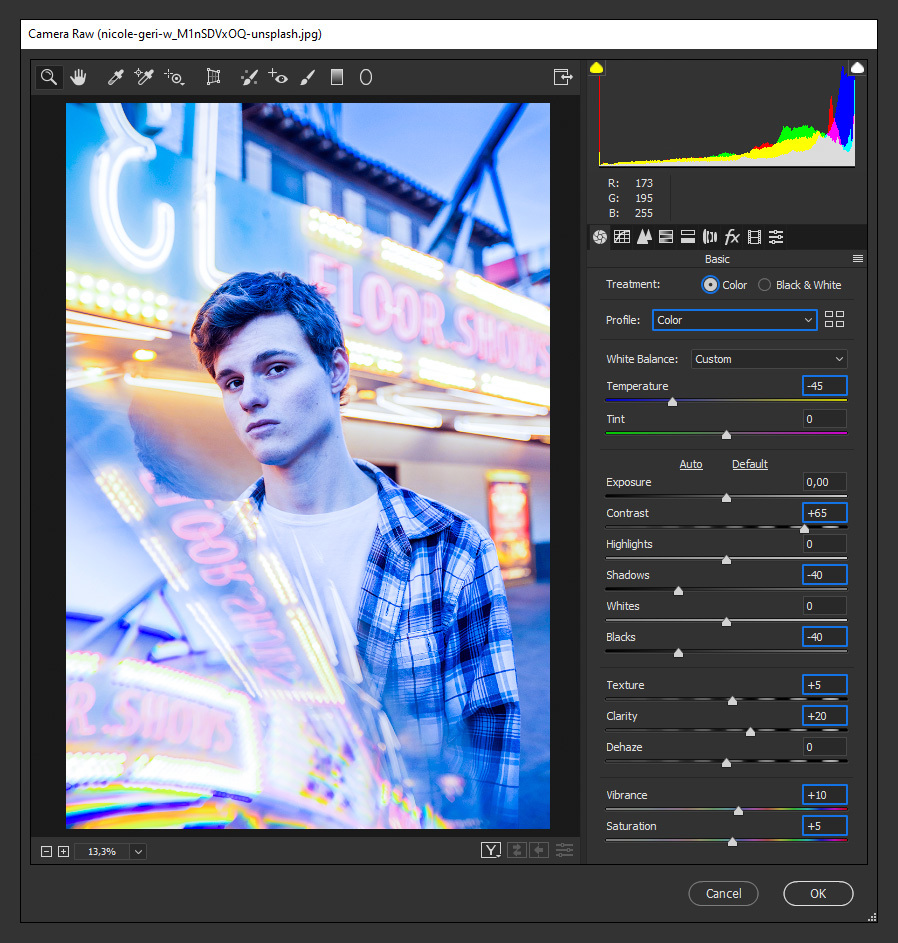
Step 5
In the “Basic” tab, apply the following settings.
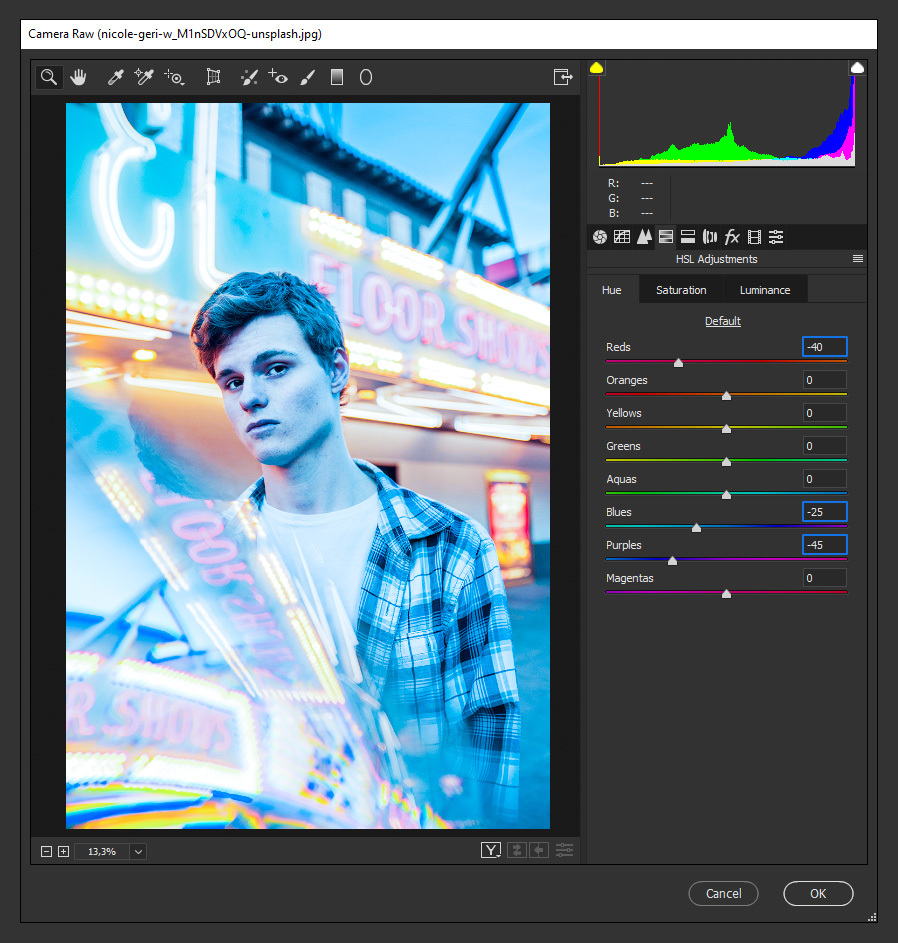
Step 6
Click on the “HSL Adjustments” tab and under “Hue” use the following values.
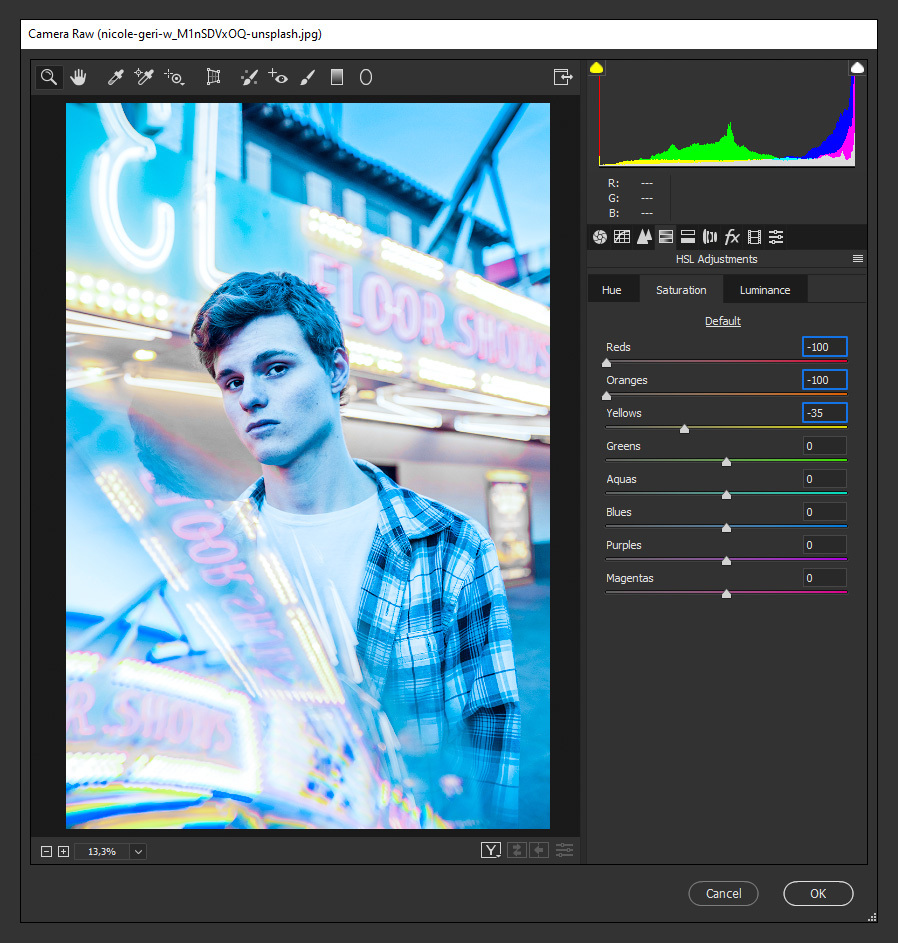
Step 7
Click on the “Saturation” tab and apply these values.
Step 8
Now, select the “Luminance” tab and apply the following values.

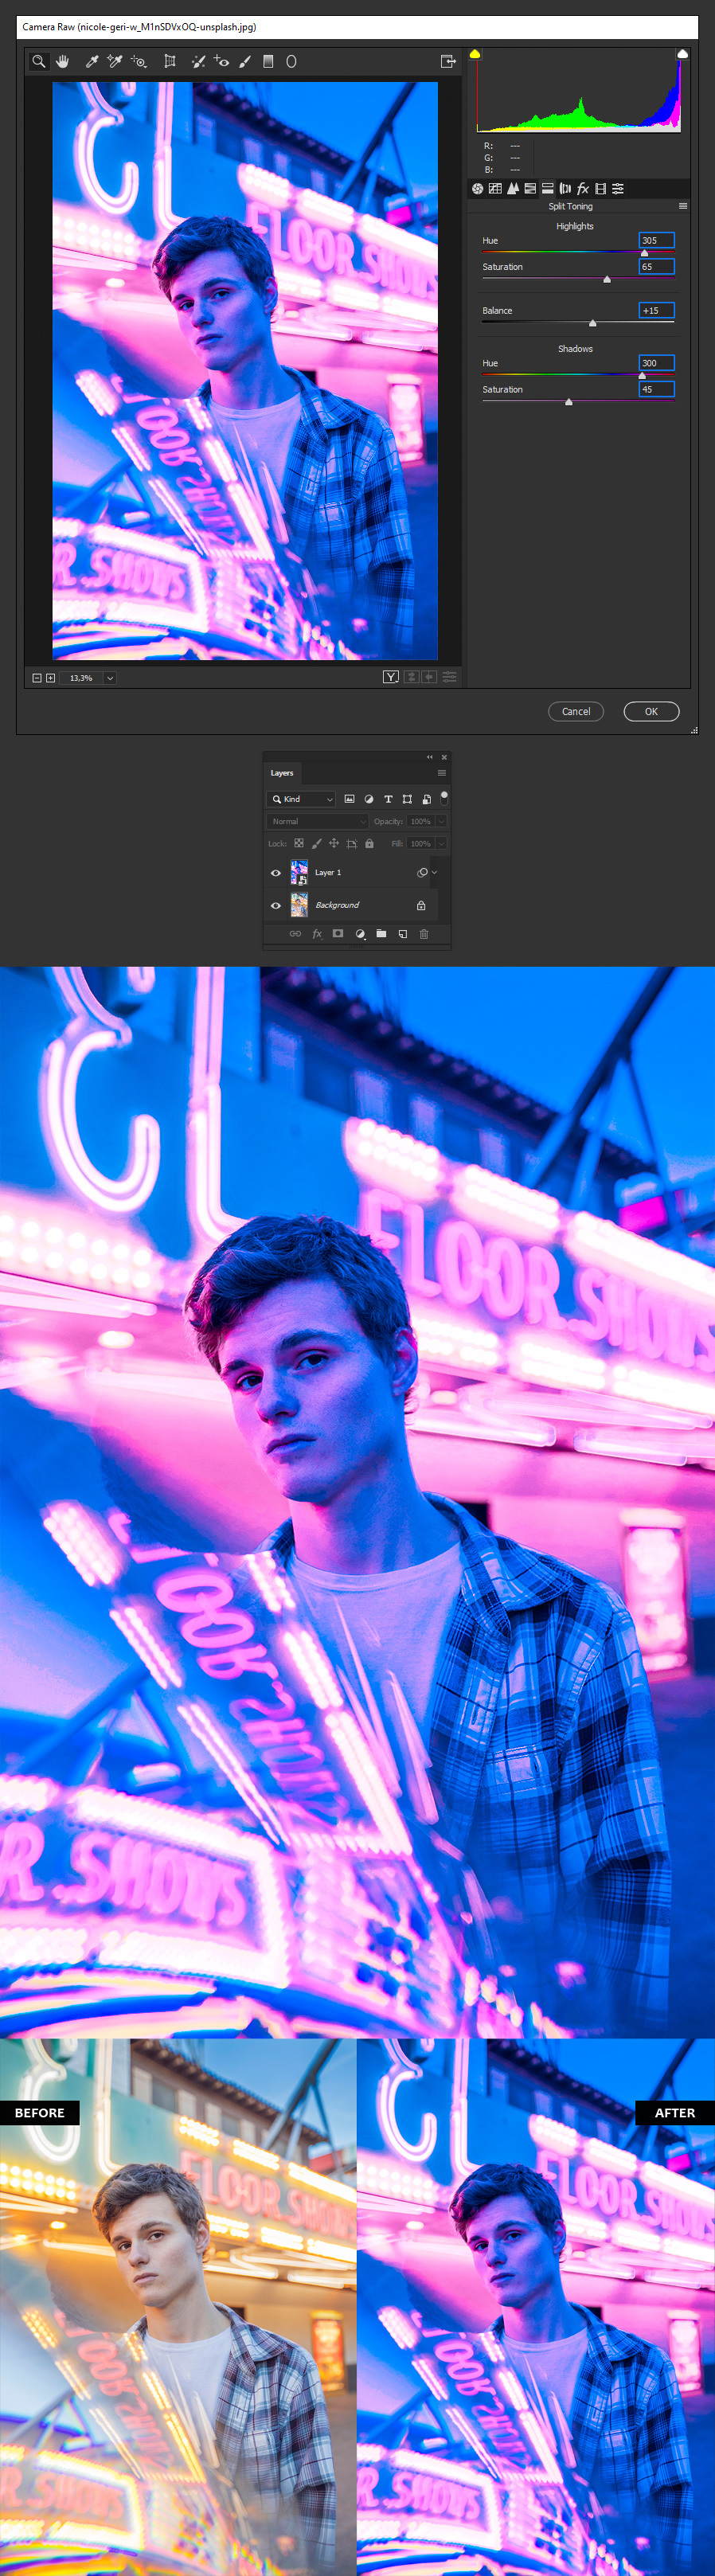
Step 9
Lastly, click on the “Split Toning” tab,apply the following settings and click OK.