How to Make a 3D Tube Text Effect in Photoshop
![](https://photoshopwizards.com/wp-content/uploads/2023/09/image-6.png)
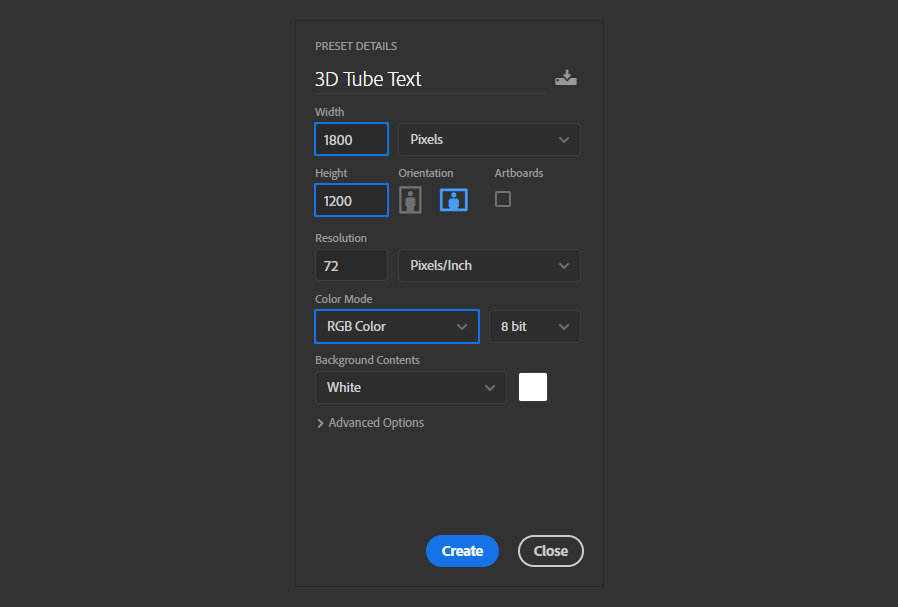
Open Photoshop and make a new file at any size you want. In this case, I will setup mine at 1800 x 1200 px.
![](https://s3.medialoot.com/blog-images/How-to-Make-a-3D-Tube-Text-Effect-in-Photoshop/01.jpg?mtime=20200419154620)
Step 2
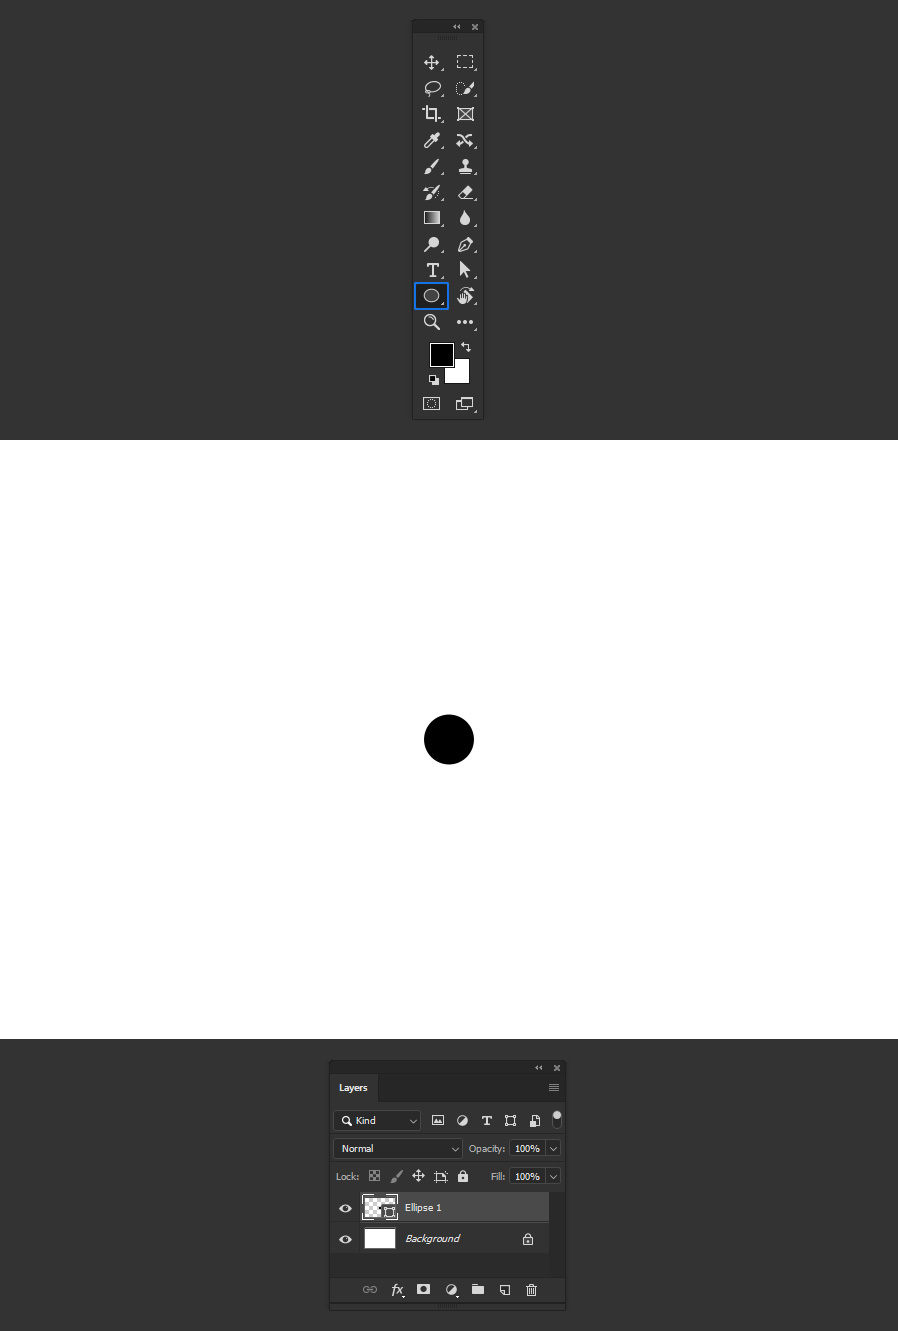
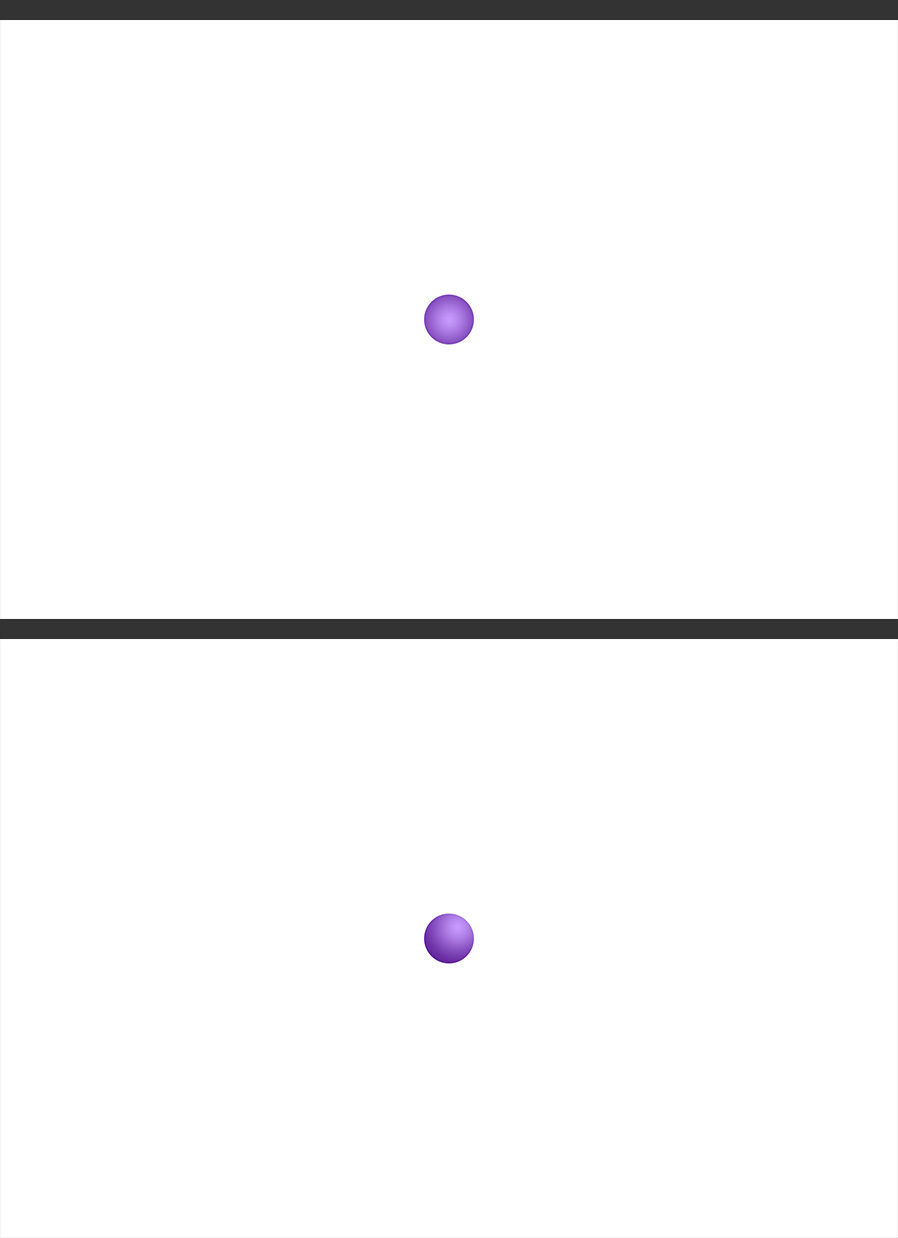
Select the Ellipse Tool (U), and in a new layer draw a circle of approximately 100px.
![](https://s3.medialoot.com/blog-images/How-to-Make-a-3D-Tube-Text-Effect-in-Photoshop/02.jpg?mtime=20200419154621)
Step 3
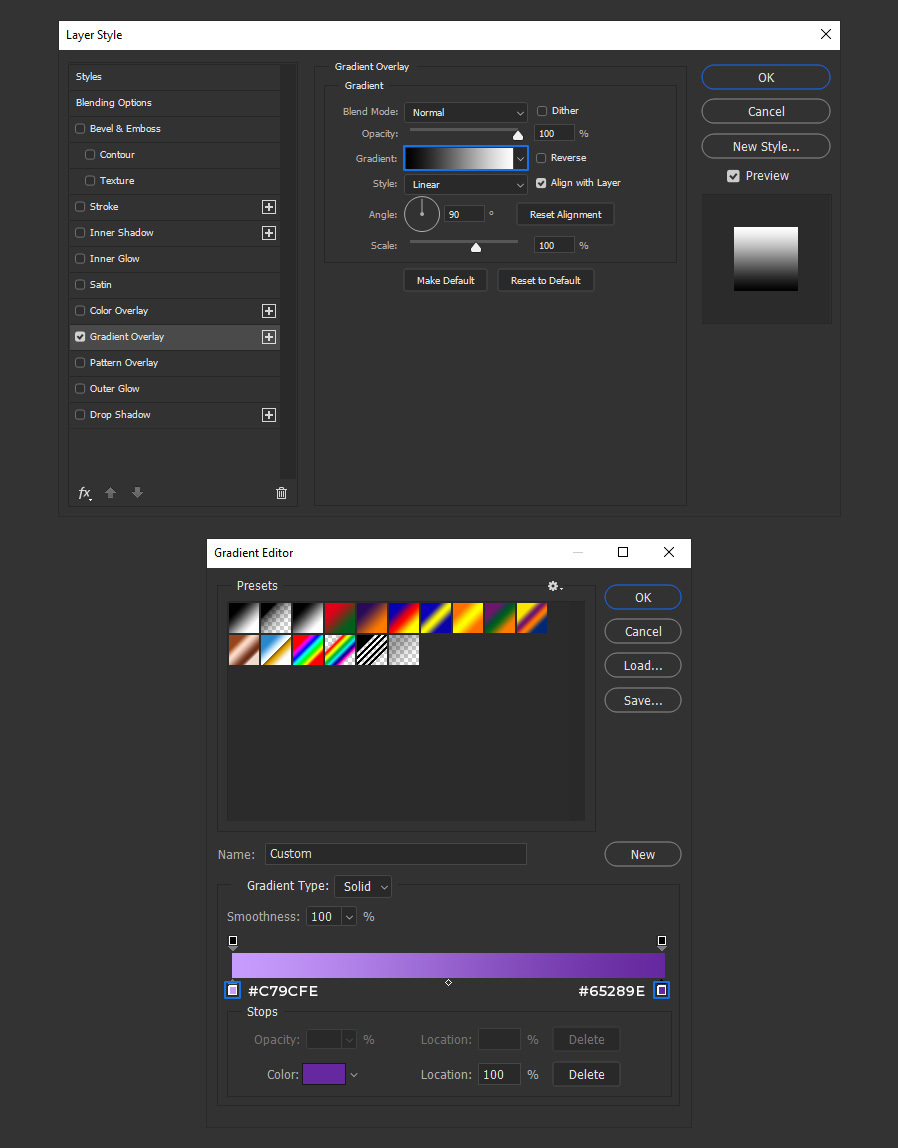
Go to Layer > Layer Style > Gradient Overlay.
![](https://s3.medialoot.com/blog-images/How-to-Make-a-3D-Tube-Text-Effect-in-Photoshop/03.jpg?mtime=20200419154622)
Step 4
Click on the Gradient Thumbnail and in the Gradient Editor set the first color stop to #c79cfe, the second color stop to #65289e and click OK.
![](https://s3.medialoot.com/blog-images/How-to-Make-a-3D-Tube-Text-Effect-in-Photoshop/04.jpg?mtime=20200419154623)
Step 5
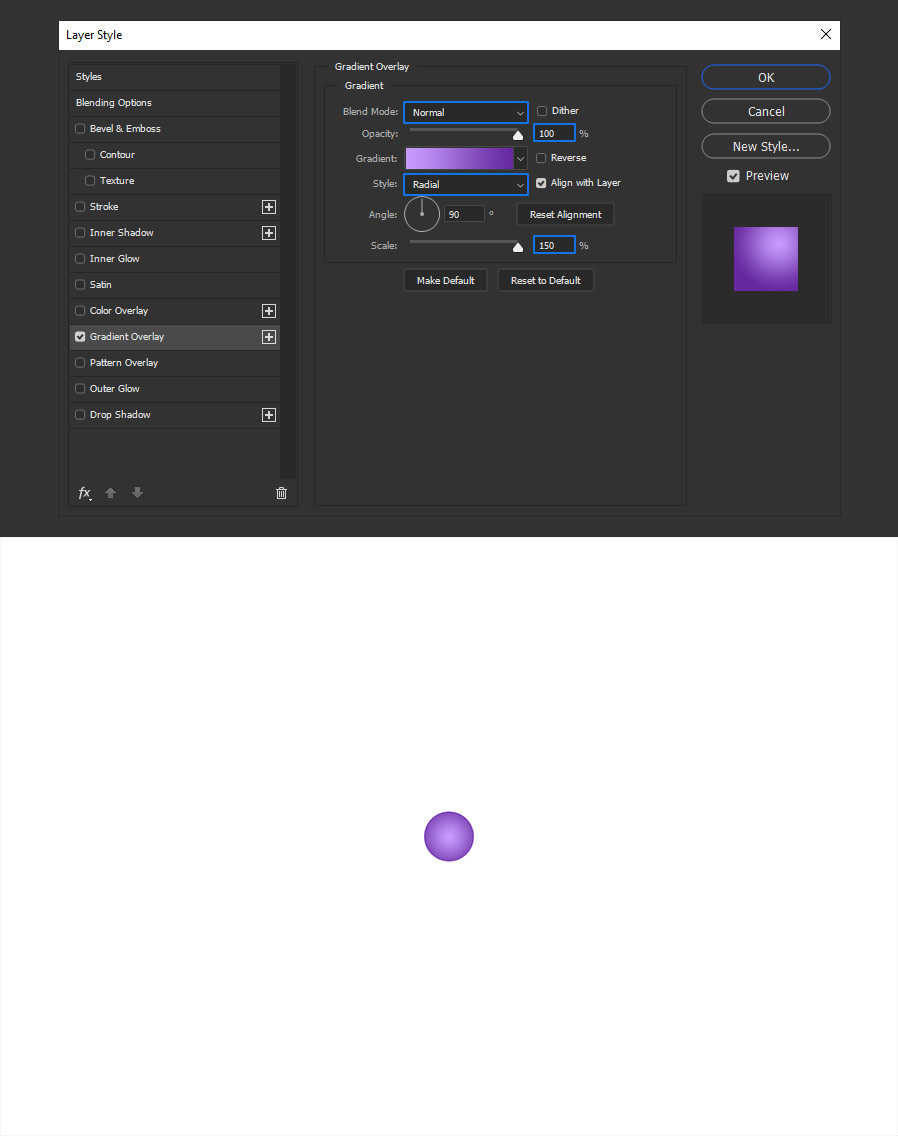
Apply the following settings (but do not click OK yet).
![](https://s3.medialoot.com/blog-images/How-to-Make-a-3D-Tube-Text-Effect-in-Photoshop/05.jpg?mtime=20200419154624)
Step 6
With the Layer Style window still visible, click and drag over the circle to reposition the gradient as shown.
![](https://s3.medialoot.com/blog-images/How-to-Make-a-3D-Tube-Text-Effect-in-Photoshop/06.jpg?mtime=20200419154625)
Step 7
Click OK in the Layer Style window.
![](https://s3.medialoot.com/blog-images/How-to-Make-a-3D-Tube-Text-Effect-in-Photoshop/07.jpg?mtime=20200419154625)
Step 8
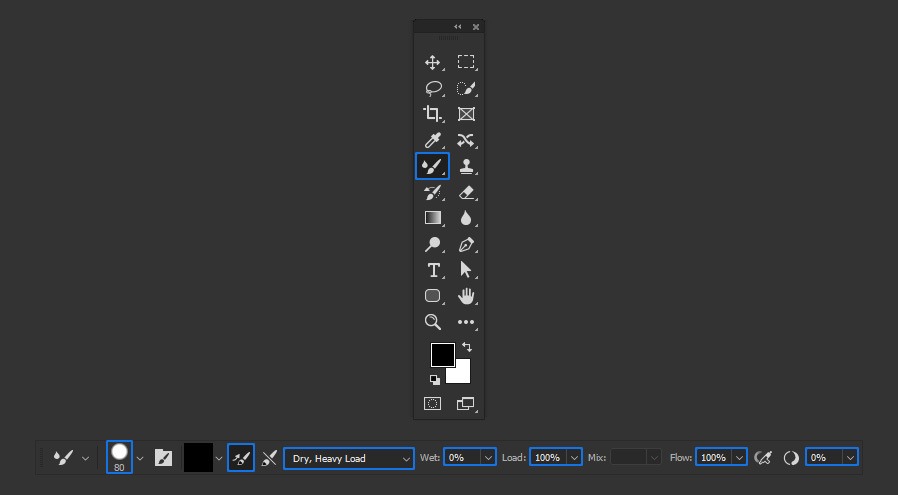
Go to Layer > Rasterize > Layer Style.
![](https://s3.medialoot.com/blog-images/How-to-Make-a-3D-Tube-Text-Effect-in-Photoshop/08.jpg?mtime=20200419154626)
Step 9
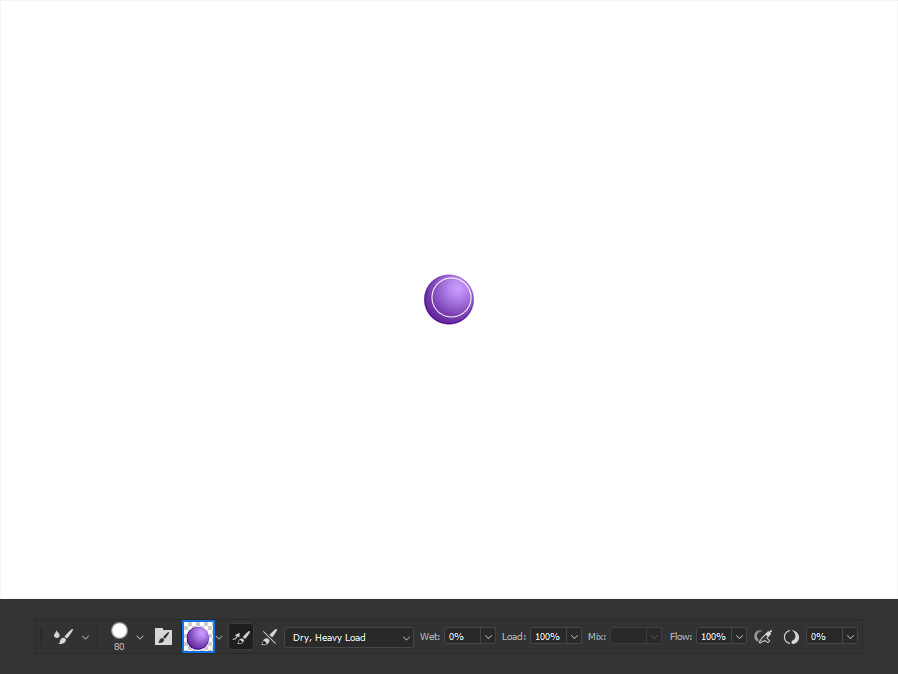
Select the Mixer Brush Tool (B) and in the top toolbar set the following values.
![](https://s3.medialoot.com/blog-images/How-to-Make-a-3D-Tube-Text-Effect-in-Photoshop/09.jpg?mtime=20200419154627)
Step 10
With the Mixer Brush Tool already set, position the cursor over the circle and while holding the Alt key on your keyboard click once to sample a portion of the circle as shown.
![](https://s3.medialoot.com/blog-images/How-to-Make-a-3D-Tube-Text-Effect-in-Photoshop/10.jpg?mtime=20200419154627)
Step 11
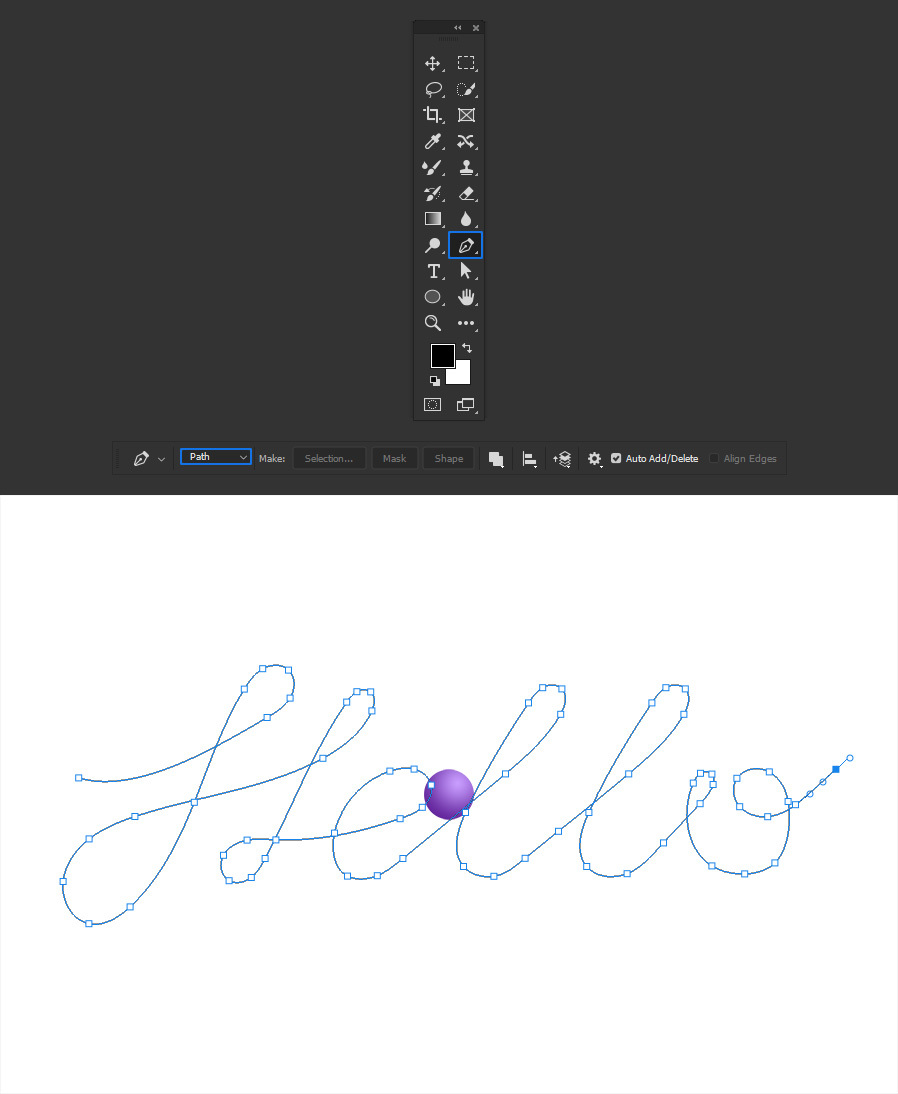
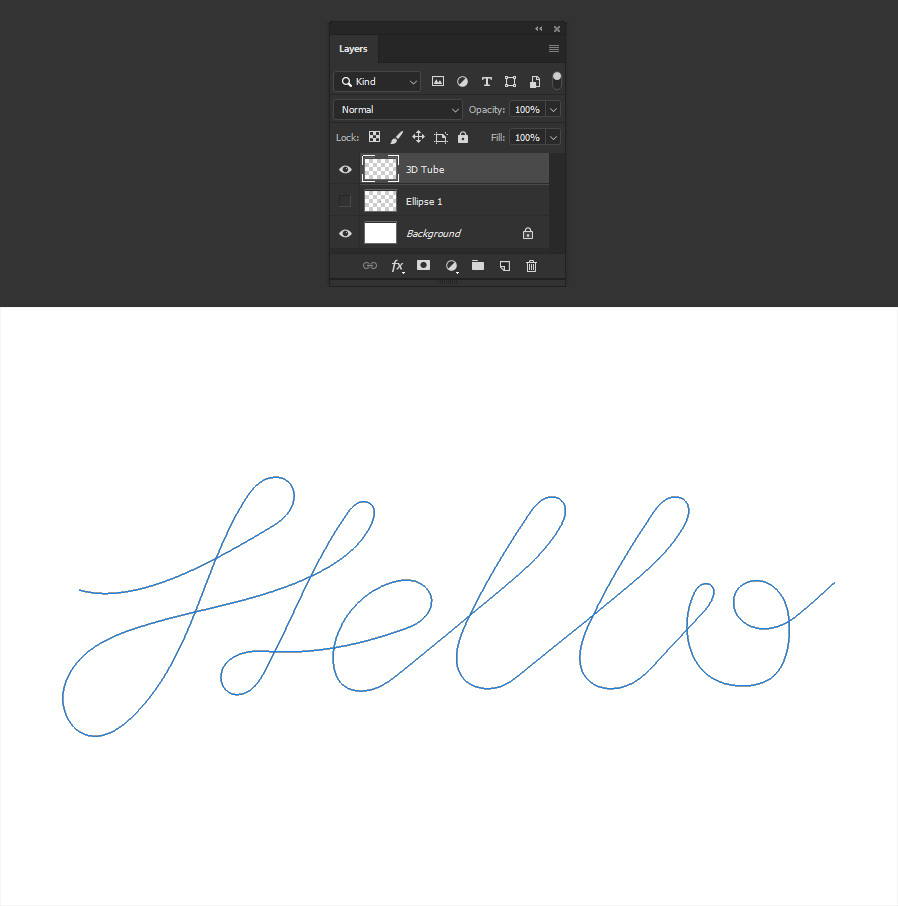
Select the Pen Tool (P), be sure to have the mode in the top toolbar set to “Path” and draw your text. In this case i will simply write “Hello”.
![](https://s3.medialoot.com/blog-images/How-to-Make-a-3D-Tube-Text-Effect-in-Photoshop/11.jpg?mtime=20200419154628)
Step 12
Hide the Ellipse layer and make a new layer called “3D Tube”.
![](https://s3.medialoot.com/blog-images/How-to-Make-a-3D-Tube-Text-Effect-in-Photoshop/12.jpg?mtime=20200419154629)
Step 13
In the Paths window (Window > Paths) and with the Pen Tool still selected, right click over the recently created Work Path and from the dropdown menu select “Stroke Path”.
![](https://s3.medialoot.com/blog-images/How-to-Make-a-3D-Tube-Text-Effect-in-Photoshop/13.jpg?mtime=20200419154629)
Step 14
To finish the 3D Tube effect, in the Stroke Path window select the “Mixer Brush Tool” from the dropdown menu and click OK.
![](https://s3.medialoot.com/blog-images/How-to-Make-a-3D-Tube-Text-Effect-in-Photoshop/14.jpg?mtime=20200419154630)