Photoshop Quick Tip: Creating Depth of Field Using the Lens Blur Filter

First up, lets grab a good photo to experiment on. I found this awesome traffic shot by SmokingPermitted on Flickr.I like this photo because it has a very long focus. Basically items in the foreground and background are in focus.

Once the photo is open in Photoshop, switch over to Quick Mask Mode (Q) and use a large soft black brush to draw a line across the first row of cars.

Now exit Quick Mask Mode, and should should have a selection like the one below.

Now, over on the Channels Panel, click the new Create New Channel icon and fill the selection with white.

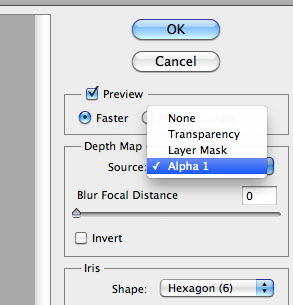
Now you can release the selection (Cmd+D) and switch back over to your layers. Lets open the Lens Blur Filter from (Filter | Blur | Lens Blur). In the Lens Blur window choose “Alpha 1” (which is the new alpha channel you created) as the Depth Map.

Select Okay and your image should be blurred similar to the one below. I love this effect because it creates a tilt/shift style blur giving the scene a micro look.

To bump the contrast further the tilt/shift effect, lets duplicate the layer, and set the duplicate layer’s blending mode to Overlay.

I love it!


